
Last updated on January 25, 2026
Home security has changed. In 2026, you don’t need to be locked into expensive monthly contracts for a powerful, local, and fully customizable alarm system. For Home Assistant users, the Alarmo integration has cemented its place as the definitive solution for building a professional-grade security system without the fees. Alarmo transforms your existing ecosystem of sensors into a cohesive security hub, giving you absolute control over your home’s protection.
Why Alarmo is Still the King of DIY Security in 2026
Over the years, Alarmo has matured into an incredibly robust and reliable integration. Its real power lies in its flexibility. It lets you monitor and control every single aspect of your home’s security, from motion detection to the status of doors and windows. You can customize alerts, define multiple security areas, and create powerful Home Assistant alarm automations, all with 100% local processing that puts your privacy first.
Alarmo’s Core Features
Beyond its intuitive UI that blends seamlessly into Home Assistant, Alarmo packs a feature set that makes it the go-to security component for any serious smart home enthusiast:
- Area Management: Divide your system into multiple zones (e.g., “Downstairs,” “Garage,” “Exterior”) that can be armed and disarmed independently.
- Multi-User Support: Create multiple users with individual PIN codes or passwords and customizable permission levels. Perfect for giving access to family members or trusted staff.
- Flexible Arming Modes: Configure up to 5 arming modes (Away, Home, Night, Vacation, Custom), each with its own entry/exit delay times and active sensors.
- Integrated Actions and Notifications: Right from its control panel, you can set up push notifications to your phone or trigger a Zigbee siren the moment the alarm is tripped.
- Master Alarm: Includes a “Master” entity that lets you arm or disarm all configured areas simultaneously, streamlining daily operation.
Prerequisites: What You’ll Need to Get Started with Alarmo
To start your Alarmo setup, you’ll need a few basics in your Home Assistant installation:
- A working Home Assistant instance, fully updated to the latest 2026 version.
- At least one
binary_sensor. These are the backbone of any alarm system: door/window sensors, motion sensors, vibration detectors, etc. - (Optional but highly recommended) Notification and action devices: a siren, smart speakers, lights, or a smartphone to receive alerts.
Installing Alarmo via HACS
Installation is a breeze thanks to the Home Assistant Community Store (HACS):
- Open HACS from your Home Assistant sidebar.
- Navigate to the “Integrations” section and click the “+ Explore & Download Repositories” button.
- Search for “Alarmo” and select it.
- Click “Download.” Once the download is complete, Home Assistant will prompt you to restart.
- After restarting, go to Settings > Devices & Services, click “+ Add Integration,” and search for “Alarmo” to complete the initial setup.
[Screenshot showing a search for Alarmo in the HACS store in 2026]
Step-by-Step Setup Guide
Once installed, you’ll find the Alarmo panel in your Home Assistant sidebar. The configuration is neatly divided into four main tabs.
1. General Tab
This is where you define the global behavior of your alarm.
- General Settings: You can enable MQTT control if needed and, most importantly, enable the Master Alarm if you have multiple areas.
- Modes: Enable and configure the modes you’ll use (Away, Home, Night, etc.). For each mode, you can set:
- Exit delay: The time you have to leave the house after arming the alarm.
- Entry delay: The time you have to disarm the alarm upon returning before it triggers.
- Trigger time: How long the siren will sound before silencing itself (or until disarmed).
- Areas: Create the different zones for your home, like “First Floor” and “Second Floor.” You’ll assign sensors to them later.
[Screenshot of the Alarmo General Tab, showing mode and area configuration]
2. Sensors Tab
Alarmo automatically discovers all your binary_sensor entities. In this tab, you decide how each one behaves.
Click on a sensor to configure it:
- Area Assignment: Assign the sensor to an area (e.g., the front door sensor belongs to “First Floor”).
- Arming Modes: Select in which modes this sensor should be active. For instance, an indoor motion sensor should be active in “Away” mode but not in “Home” mode.
- Advanced Settings:
- Use entry/exit delay: A must-have for sensors on your main entry/exit doors.
- Arm after close: Super useful for the front door. If enabled, the exit countdown is skipped as soon as the door is closed.
- Automatically bypass: If a window is open when you arm the alarm, this sensor will be ignored to prevent false alarms.
- Trigger when unavailable: An extra security measure that triggers the alarm if a sensor loses its connection (potential tampering).
[Screenshot of the detailed configuration for a door sensor in Alarmo]
3. Codes Tab
Here you manage who can interact with the alarm and how.
- Code Requirement: You can set whether a PIN is needed for arming, disarming, or both.
- User Management: Create users with unique names and PIN codes. You can assign specific permissions to each user, like only allowing them to control certain areas.
Creating a Sensor to Track Who Changed the Alarm State
Want to know which user armed or disarmed the alarm? You can create a template sensor. Since the Home Assistant updates over the last couple of years, the best practice is to do this via the UI in Settings > Devices & Services > Helpers. But for you YAML warriors, here’s the modern code:
# configuration.yaml
template:
  - sensor:
      - name: "Alarmo Master Status"
        state: >-
          {% set state = states('alarm_control_panel.alarmo_master') %}
          {% if state == 'armed_away' %}
            Armed Away
          {% elif state == 'armed_home' %}
            Armed Home
          {% elif state == 'armed_night' %}
            Armed Night
          {% elif state == 'arming' %}
            Arming
          {% elif state == 'disarmed' %}
            Disarmed
          {% elif state == 'triggered' %}
            TRIGGERED!
          {% else %}
            Unknown
          {% endif %}
        attributes:
          changed_by: "{{ state_attr('alarm_control_panel.alarmo_master', 'changed_by') }}"

  - sensor:
      - name: "Alarmo Last Change"
        state: "User {{ state_attr('sensor.alarmo_master_status', 'changed_by') | replace('null', 'System') }} changed the alarm state to: {{ states('sensor.alarmo_master_status') }}"
Note: Replace alarm_control_panel.alarmo_master with the entity ID of your Alarmo panel.
4. Actions Tab
This is the brain of your alarm’s response system. Here you define what happens during each event.
- Notifications: Set up messages for your phone. Example: “Send notification to My Phone when the alarm is TRIGGERED.” You can customize the message to include which sensor was tripped.
- Actions: Control other entities in Home Assistant. Example: “Turn on the entity
siren_garagewhen the alarm is TRIGGERED in the Garage Area.”
Advanced Automations: Practical Examples
While the Actions tab is powerful, you can use Home Assistant’s native automations for more complex logic.
Example 1: Zigbee Siren with Strobe Light Effect
This automation triggers a siren and flashes all interior lights when the alarm is tripped.
# automations.yaml
- alias: '[Alarm] Activate Siren and Lights on Intrusion'
  trigger:
    - platform: state
      entity_id: alarm_control_panel.alarmo_master
      to: 'triggered'
  action:
    - service: switch.turn_on
      target:
        entity_id: switch.zigbee_siren_switch
    - service: light.turn_on
      target:
        entity_id: light.all_interior_lights
      data:
        flash: long
Example 2: Notification with Camera Snapshot
Get a snapshot from your porch camera if the front door sensor is triggered while the alarm is armed.
# automations.yaml
- alias: '[Alarm] Notification with Photo on Intrusion'
  trigger:
    - platform: state
      entity_id: binary_sensor.front_door_sensor
      to: 'on'
  condition:
    - condition: or
      conditions:
        - condition: state
          entity_id: alarm_control_panel.first_floor
          state: 'armed_away'
        - condition: state
          entity_id: alarm_control_panel.first_floor
          state: 'armed_vacation'
  action:
    - service: camera.snapshot
      target:
        entity_id: camera.porch_camera
      data:
        filename: '/config/www/snapshots/intrusion_porch.jpg'
    - delay: '00:00:01'
    - service: notify.mobile_app_my_phone
      data:
        message: "INTRUSION ALERT! The front door has been opened."
        data:
          image: '/local/snapshots/intrusion_porch.jpg'
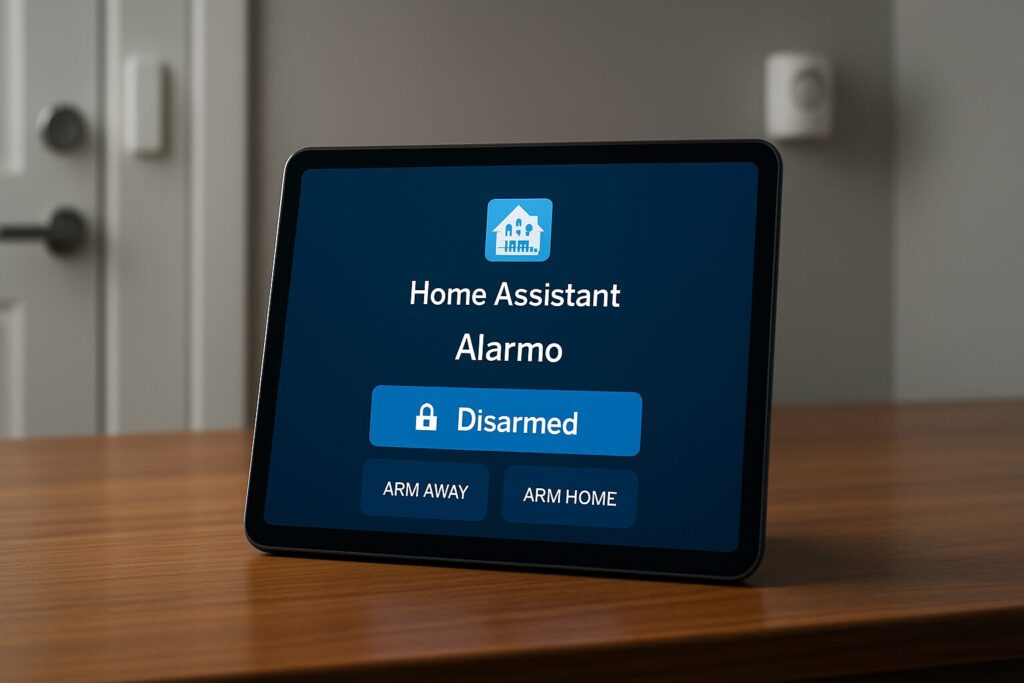
Visualization: The Alarmo Card for Your Dashboard
A crucial part of any alarm is easy interaction. The Alarmo Lovelace card (now just Dashboards) gives you a full-featured control panel.
How to add the Alarmo card:
- Open the Dashboard where you want to add it and click “Edit Dashboard.”
- Click “+ Add Card.”
- Search for the “Alarmo” card in the list.
- Select the Alarmo entity you want to control (e.g., your Master Alarm or a specific area).
- You can customize which buttons and states are visible.
- Save it, and you’re done! You now have a numeric keypad and status controls right on your UI.
[Screenshot of the Alarmo Card configured on a Home Assistant dashboard]
Alarmo vs. Other Home Assistant Alternatives
In 2026, while there are several ways to handle security in Home Assistant, Alarmo hits the sweet spot between power and ease of use. Here’s a quick breakdown:
| Feature | Alarmo | Manual Alarm (Helper) | Commercial Integrations (Ring, etc.) |
|---|---|---|---|
| Cost | Free | Free | Hardware Cost + Monthly Subscription |
| Local Control | Yes, 100% | Yes, 100% | No, cloud-dependent |
| User Management | Advanced (multiple users, PINs, permissions) | Basic (single code) | Varies by manufacturer |
| Area Management | Yes | No | Usually No |
| Ease of Setup | Medium (Guided GUI) | High (very simple), but requires manual automations | High (Walled garden) |
FAQ & Common Troubleshooting
- My alarm triggers instantly, ignoring the entry delay. What’s wrong?
- Head to the “Sensors” tab in Alarmo, select the sensor in question, and make sure the “Use entry delay” toggle is enabled for it. This is critical for any access doors.
- Alarmo isn’t detecting my new motion sensor. How do I add it?
- Alarmo looks for entities in the
binary_sensordomain. If you’ve just added a new sensor, go to Settings > Devices & Services, find the Alarmo integration, click the three-dot menu, and select “Reload.” This will force it to rescan for new sensors. - Can I arm the alarm if a window is open?
- Yes. If you have the “Automatically bypass” option enabled in the advanced settings for that window’s sensor, Alarmo will arm successfully while ignoring that sensor until it is closed.
- How do I back up my Alarmo configuration?
- The Alarmo configuration is stored within your core Home Assistant installation. Any full backup of Home Assistant, like the ones you can schedule with the built-in backup feature or third-party add-ons, will automatically include all your Alarmo settings.
Conclusion
In 2026, Alarmo for Home Assistant isn’t just another integration; it’s the cornerstone of a truly smart, private, and subscription-free home security system. Its combination of advanced features, a guided UI setup, and the ability to integrate with virtually any device in Home Assistant makes it the most logical and powerful choice for protecting what matters most. If you’re serious about your home security, investing the time to set up Alarmo is one of the best upgrades you can make to your smart home.