
As an Amazon Associate, I earn from qualifying purchases. En calidad de Afiliado de Amazon, obtengo ingresos por las compras adscritas que cumplen los requisitos aplicables. If you buy through these links, the price is the same for you and Amazon pays me a small commission that helps keep Tecnoyfoto running.
Last updated: February 2, 2026
In this definitive 2026 guide, I’ll walk you step-by-step through connecting a BMP280 sensor to an ESP32 using the I2C protocol. We’re taking a hands-on approach, focusing on seamless integration with ESPHome and Home Assistant. Plus, we’ll tackle the most common errors head-on, like the dreaded “Could not find a valid BMP280 sensor” message, so your project works flawlessly the first time.
What You’ll Need for This 2026 Project
To follow this ESP32 BMP280 I2C tutorial, you’ll need a few key components. I’ve selected options that offer the best bang-for-your-buck on the market in 2026:
- Microcontroller: An ESP32 development board is my top pick for its power and versatility. Alternatives like the ESP8266 or a Wemos D1 Mini are also compatible.
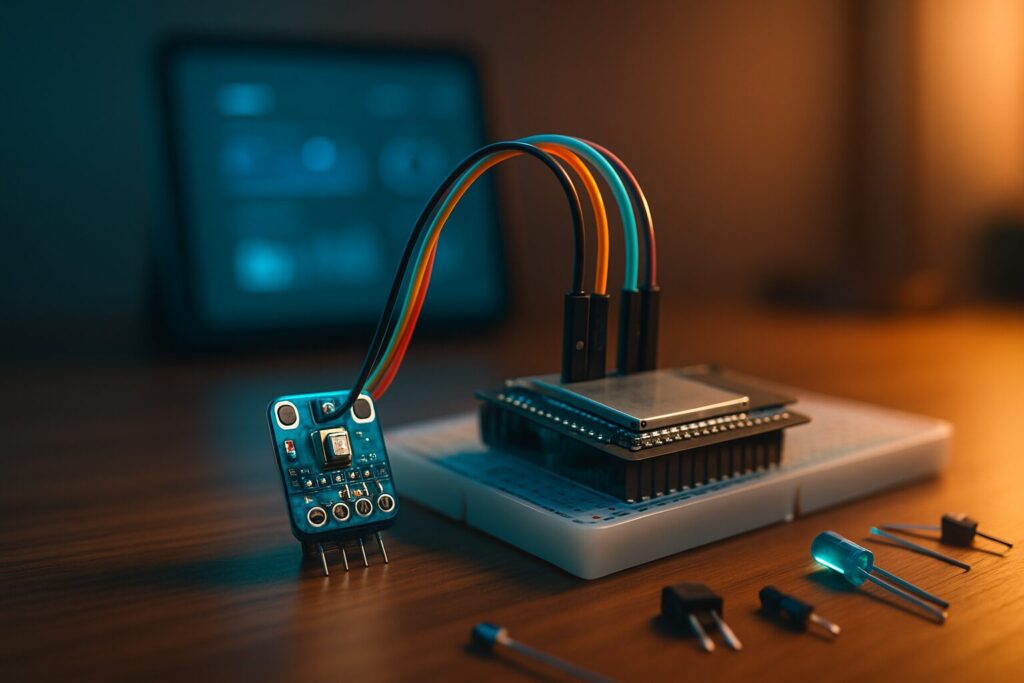
- Sensor: A BMP280 barometric pressure sensorAffiliate link module. We’ll compare it to other options in a moment.
- Wiring: DuPont jumper wiresAffiliate link (male-to-female). If you want a more polished look, you can always make your own custom cables.
- Power: A 3.3V or 5V power source, which is typically supplied by the ESP32 itself via its USB-C cable (the universal standard in 2026).
The BMP280 Sensor: A 2026 Tech Deep Dive
The Bosch BMP280 has remained a crowd favorite for years, and for good reason: it’s reliable, accurate, and incredibly affordable. This tiny powerhouse measures two key environmental variables: barometric pressure and ambient temperature. Its high precision makes it the ideal barometric sensor for ESP32 projects like DIY weather stations, drone altimeters, or environmental monitoring systems.
Communication with the microcontroller is handled via the I²C or SPI bus. We’re using I2C because it’s the simplest to implement, requiring only two data wires (SDA and SCL). While newer sensors exist, the BMP280 is still a fantastic gateway into the IoT world thanks to its simplicity and the massive amount of available documentation.
Key Technical Specs (From the Datasheet)
- Communication Interface: I2C or SPI
- Operating Voltage: 1.8V – 3.6V (most modules include a regulator to accept 5V)
- Pressure Range: 300 to 1100 hPa
- Absolute Pressure Accuracy: ±1 hPa
- Temperature Range: -40°C to 85°C (-40°F to 185°F)
- Temperature Accuracy: ±1.0°C
- Power Consumption: Ultra-low, making it perfect for battery-powered projects.
BMP280 vs. BME280 vs. BMP180: Which One to Choose in 2026?
While this tutorial focuses on the BMP280, it’s crucial to know the lineup to pick the right sensor for your project. The BMP180 is its obsolete and hard-to-find predecessor, while the BME280 is its bigger brother, which adds relative humidity measurement to the mix.
Here’s a quick comparison table to help you decide:
| Sensor | Measures | Typical Accuracy | Key Feature | Price Range (2026) |
|---|---|---|---|---|
| BMP180 | Temperature, Pressure | ±2 hPa, ±2.0°C | Obsolete, low performance | Varies (old stock) |
| BMP280 | Temperature, Pressure | ±1 hPa, ±1.0°C | Excellent cost/performance ratio | $2 – $5 |
| BME280 | Temp, Pressure, Humidity | ±1 hPa, ±1.0°C, ±3% RH | All-in-one solution | $5 – $10 |
My 2026 Recommendation: If you only need temperature and pressure, the BMP280 is a fantastic, budget-friendly choice. If humidity is a critical metric for your project (e.g., for calculating dew point), spend the extra few bucks on the BME280.
Wiring the BMP280 to Your ESP32 (I2C)
Wiring the ESP32 BMP280 combo is a breeze thanks to the I2C bus. We only need four connections. Most ESP32 boards have default I2C pins on GPIO21 (SDA) and GPIO22 (SCL).
- VIN (Sensor) → 3V3 (ESP32)
- GND (Sensor) → GND (ESP32)
- SDA (Sensor) → GPIO21 (ESP32)
- SCL (Sensor) → GPIO22 (ESP32)
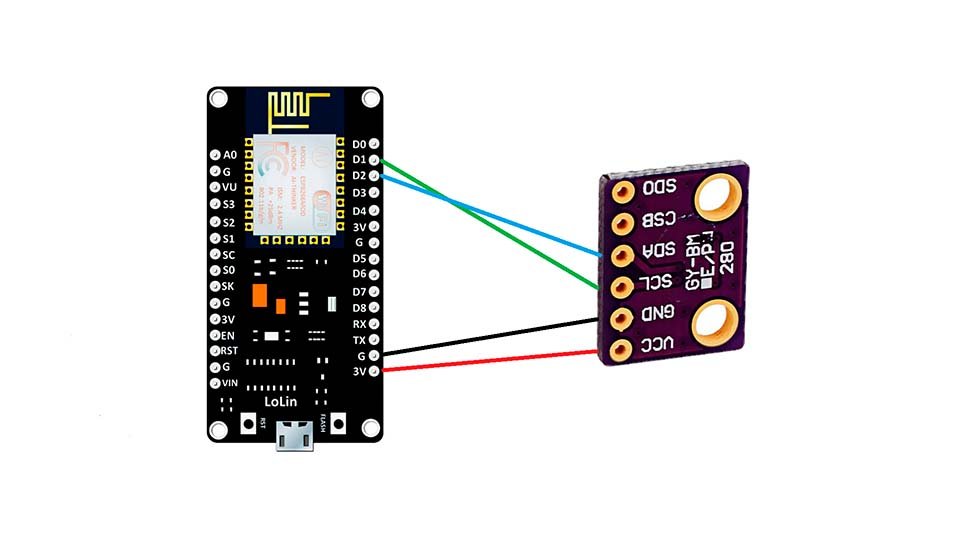
Quick Note: The image shows a Wemos D1 Mini (an ESP8266 board), but the wiring concept is identical. Just make sure you’re using pins GPIO21 and GPIO22 on your specific ESP32 board.
ESPHome Configuration for Home Assistant (2026 Code)
Hardware’s done. Let’s get to the fun part: the code. The easiest and most powerful way to program our device is with ESPHome, the go-to tool for integrating DIY devices into Home Assistant.
I’m assuming you already have the ESPHome dashboard running. If not, you can easily install it from the Apps store (what we used to call Add-ons) inside your Home Assistant instance.
Create a new device in ESPHome and paste the following YAML code into its editor:
# I2C bus configuration for the ESP32
i2c:
  sda: GPIO21
  scl: GPIO22
  scan: true
  id: bus_a

# Sensor platform definition
sensor:
  - platform: bmp280
    # Temperature Sensor
    temperature:
      name: "Living Room BMP280 Temperature"
      oversampling: 16x
    # Pressure Sensor
    pressure:
      name: "Living Room BMP280 Pressure"
    # I2C address of the sensor
    address: 0x76
    # How often to fetch data
    update_interval: 60s
Troubleshooting: Fixing the “Could not find a valid sensor” Error
If you flash the code and your ESPHome logs scream about not finding a sensor at address 0x76, don’t panic. This is the most common hiccup and it’s usually an easy fix:
- Check the I2C Address: Some BMP280 modules ship with the address
0x77. Simply change theaddress: 0x76line in your code toaddress: 0x77and re-flash the device. - Double-Check Your Wiring: A classic mistake is swapping the SDA and SCL wires. Confirm that SDA from the sensor goes to GPIO21 and SCL goes to GPIO22. Also, make sure VIN and GND have a solid connection.
- Check for Power Issues: While rare, if you’re powering multiple components from the ESP32, the sensor might not be getting enough juice. Try powering it with a separate 3.3V supply as a test.
Calibration & Accuracy: Taking Your Readings to the Next Level
Out of the box, the BMP280 is pretty darn accurate. But if you’re a perfectionist and notice a consistent, small offset compared to a reference weather station, ESPHome lets you apply a filter to calibrate the readings for maximum precision.
For example, if you notice your sensor consistently reads 0.8°C too high, you can add an offset filter to correct it:
sensor:
  - platform: bmp280
    temperature:
      name: "Living Room BMP280 Temperature"
      oversampling: 16x
      filters:
        - offset: -0.8
    pressure:
      name: "Living Room BMP280 Pressure"
      filters:
        - offset: 1.2 # Example to correct pressure if it's reading 1.2 hPa too low
    address: 0x76
    update_interval: 60s
With this simple addition, your measurements will become much more reliable, turning your DIY project into a high-quality data source for your Home Assistant automations.
Wrapping Up
Connecting a BMP280 sensor to an ESP32 in 2026 remains a foundational and highly rewarding project for anyone diving into IoT and DIY home automation. By following this guide, you’ve not only assembled a functional sensor but also learned how to diagnose common issues and calibrate its readings for peak accuracy. You now have a solid base to build your own weather station or any other project that requires precise environmental data.
Disclaimer
This guide assumes you have an intermediate understanding of electronics and software. Experimenting with hardware carries inherent risks. While this tutorial has been crafted with the utmost care, I offer no warranties and assume no liability for any damages that may result from following these instructions. Always proceed with caution.