
As an Amazon Associate, I earn from qualifying purchases. En calidad de Afiliado de Amazon, obtengo ingresos por las compras adscritas que cumplen los requisitos aplicables. If you buy through these links, the price is the same for you and Amazon pays me a small commission that helps keep Tecnoyfoto running.
Last updated on January 23, 2026
Even in 2026, the MQ-2 sensor remains one of the most popular and budget-friendly solutions for DIY smart home projects that require gas detection. This versatile component can sniff out a wide range of substances, including smoke, LPG, butane, propane, methane, alcohol, and hydrogen. Its low cost and broad detection range make it the perfect choice for experimenting with early warning systems, basic air quality monitors, and other automations for your smart home.
Integrating the MQ-2 sensor with microcontrollers like the ESP32 or the veteran ESP8266 is a surprisingly simple process thanks to ESPHome, the framework that has revolutionized how we create custom IoT devices for Home Assistant. ESPHome lets us define the sensor’s behavior using a simple YAML configuration file, completely eliminating the need to write complex C++ code from scratch.
In this definitive 2026 guide, I’ll walk you through building your own gas detector step-by-step, from the wiring diagram to the complete YAML code and the most useful automations to help protect your home.
Required Components for This Project
To build our smart gas detector, we’ll need a few basic electronic components that I’ve personally tested. They’re easy to find and won’t break the bank.
- MQ-2 Sensor Module: The heart of the project. Make sure you buy the module version that comes mounted on a small PCB, as it includes the necessary resistors and potentiometer for it to work right out of the box.
- Wi-Fi Development Board: While this project technically works with a Wemos D1 Mini (ESP8266), I strongly recommend using an ESP32-based board for any new projects in 2026. They offer more power, more accurate Analog-to-Digital Converter (ADC) pins, and better security. Models like the ESP32-S3 or ESP32-C3 are excellent choices.
- Jumper Wires: Also known as Dupont wires (male-to-female). You can even make your own if you have the right tools.
- Power Supply: A standard 5V power supplyAffiliate link with a Micro-USB or USB-C connector (depending on your ESP32 board) is all you need to power the setup.
⚠️ Important Safety Disclaimer
Before we go any further, it’s crucial to understand this: this is a DIY project for educational and experimental purposes only. The MQ-2 sensor is not a certified safety device and should never be used as your sole method of protection against gas leaks or fires. Its accuracy can vary with temperature, humidity, and age. Always use certified, commercial smoke and carbon monoxide detectors in your home. This project is a fantastic supplement, not a replacement.
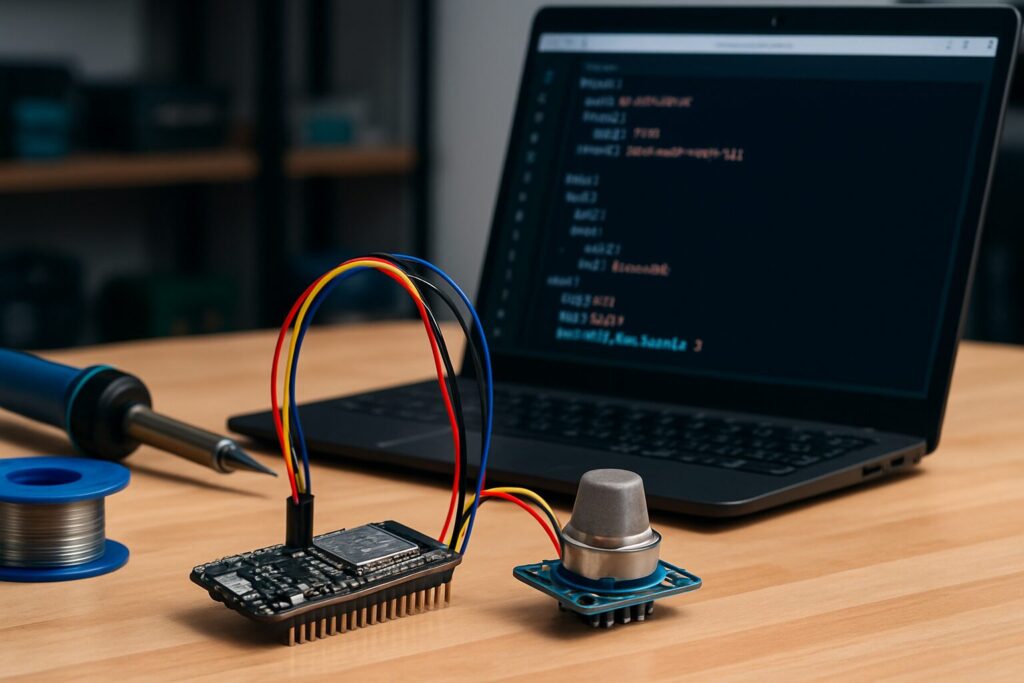
Wiring the MQ-2 Sensor to an ESP32
The hookup is incredibly straightforward. We just need to power the sensor and read its analog output. The MQ-2 module typically has 4 pins, but we’ll only need 3 for this basic guide.
Here’s the wiring diagram for a generic ESP32. Always double-check the pinout for your specific board!
- Connect the VCC pin on the MQ-2 sensor to a 5V pin on the ESP32.
- Connect the GND pin on the MQ-2 sensor to a GND pin on the ESP32.
- Connect the analog output pin A0 on the MQ-2 sensor to an ADC (Analog-to-Digital Converter) pin on the ESP32. A common and safe choice for this is GPIO34.
The fourth pin, D0 (digital output), can be used if you adjust the onboard potentiometer to trigger at a specific threshold, but reading the analog value gives us far more flexibility and control.
The Complete 2026 ESPHome YAML Code
Now for the ESPHome magic. Open your ESPHome dashboard, create a new device, and paste the following YAML code into its configuration. I’ve added substitutions to make it easy for you to customize.
substitutions:
  device_name: "living-room-gas-detector"
  friendly_name: "Living Room Gas Detector"
  # The analog pin where you connected the sensor's A0
  mq2_analog_pin: "GPIO34"
  # The load resistance on your MQ-2 module (typically 5 kOhms)
  rl_resistance: "5.0"
  # R0 value in clean air. Calibrate this for your sensor (see calibration section)
  r0_clean_air_factor: "9.83"

esphome:
  name: ${device_name}
  friendly_name: ${friendly_name}

esp32:
  board: esp32dev
  framework:
    type: arduino

# Enable logging, API for Home Assistant, and Over-The-Air updates
logger:
api:
ota:

wifi:
  ssid: "YourWiFi_SSID"
  password: "YourWiFi_Password"
  # ... other WiFi and fallback configurations ...

# Main sensor definition
sensor:
  - platform: adc
    pin: ${mq2_analog_pin}
    id: mq2_analog_value
    name: "${friendly_name} Analog Value"
    update_interval: 10s
    attenuation: 11db
    # This filter converts the voltage reading into the sensor's resistance value (Rs)
    filters:
      # Convert the 0.0-1.0 value to a 0.0-3.3V voltage (based on your ESP's reference)
      - multiply: 3.3
      - lambda: |-
          // VRL is the voltage measured at the pin
          // RL_VALUE is the load resistance (5k)
          // R0 is the clean air factor
          float vrl = x;
          if (vrl == 0) {
            return -1.0; // Avoid division by zero
          }
          float rs = (${rl_resistance} * (3.3 - vrl)) / vrl;
          return rs;
    on_value:
      # Publish the normalized Rs/R0 ratio to make automations easier
      - component.update:
          id: mq2_ratio
          value: !lambda |-
            return id(mq2_analog_value).state / ${r0_clean_air_factor};

  # A secondary sensor that exposes the clean Rs/R0 ratio
  - platform: template
    id: mq2_ratio
    name: "${friendly_name} Gas Ratio"
    unit_of_measurement: "ratio"
    icon: "mdi:gas-cylinder"
    accuracy_decimals: 2
    update_interval: 10s

# Binary sensor for quick alerts
binary_sensor:
  - platform: template
    name: "${friendly_name} Gas Detection"
    device_class: gas
    lambda: |-
      // If the ratio goes above 1.5, we consider gas to be present.
      // You MUST fine-tune this threshold yourself!
      if (id(mq2_ratio).state > 1.5) {
        return true;
      } else {
        return false;
      }
How to Calibrate Your MQ-2 Sensor
Calibration is the single most important step to get reliable—though not scientific-grade—readings. The goal is to determine the sensor’s resistance in clean air, known as `R0`. This value will be our baseline.
To calibrate your MQ-2 sensor, follow these steps:
- Assemble and Flash: Wire up the sensor to your ESP32 as shown and upload the YAML code above (you can use a temporary value for `r0_clean_air_factor`, like `10.0`, to start).
- Burn-in Period: Leave the sensor powered on in a room with the cleanest air possible (well-ventilated, no fumes or strong odors) for at least 24 hours. The sensor has a small internal heater that needs time to stabilize. This is non-negotiable for decent readings.
- Monitor the Analog Value: Go to the Logs for your device in the ESPHome dashboard. Find the sensor named `Living Room Gas Detector Analog Value`. This value represents the sensor’s resistance (Rs) in clean air.
- Calculate the Average: Once the sensor has stabilized, jot down the values it reports over several minutes. They should be fairly constant. Calculate the average of those readings.
- Update Your YAML: That average value you just calculated is your `R0`. Replace the value of `r0_clean_air_factor` in your YAML file with this new number.
- Save and Re-flash: Upload the updated configuration to your device. From now on, your `Gas Ratio` sensor should show a value close to `1.0` in clean air. When gas is present, the `Rs` value will change, causing the ratio to climb. In our code, a ratio greater than 1.0 indicates the presence of gas.
Remember that this calibration can be affected by ambient temperature and humidity, so it’s a good idea to repeat the process if you move the sensor to a new location.
3 Practical Home Assistant Automations
Once the sensor is integrated into Home Assistant, we can create some powerful automations. Here are three practical examples to get you started. You can add these directly to your `automations.yaml` file or build them using the UI.
1. Critical Mobile Notification (Smoke Detector Style)
This automation sends a high-priority notification to your phone if gas is detected, ensuring you won’t miss it. You’ll need the Home Assistant companion app configured for this to work.
- alias: 'Gas Detection Alert'
  trigger:
    - platform: state
      entity_id: binary_sensor.living_room_gas_detector_gas_detection
      to: 'on'
  action:
    - service: notify.mobile_app_your_phone_name
      data:
        title: "⚠️ GAS ALERT DETECTED!!"
        message: "A possible gas leak or smoke has been detected in the Living Room."
        data:
          push:
            sound:
              name: default
              critical: 1
              volume: 1.0
2. Trigger Automatic Ventilation
If the gas concentration exceeds a threshold for more than a minute, this automation turns on a fan connected to a smart plug to help clear the air.
- alias: 'Activate Ventilation on Gas Detection'
  trigger:
    - platform: numeric_state
      entity_id: sensor.living_room_gas_detector_gas_ratio
      above: 1.8
      for:
        minutes: 1
  condition:
    - condition: state
      entity_id: switch.fan_smart_plug
      state: 'off'
  action:
    - service: switch.turn_on
      target:
        entity_id: switch.fan_smart_plug
    - service: notify.persistent_notification
      data:
        title: "Ventilation Activated"
        message: "The living room fan has been activated due to high gas levels."
3. Activate Siren and Warning Lights
For a more urgent visual and audible alert, this automation flashes the living room lights red and triggers a Zigbee siren.
- alias: 'Visual and Audible Gas Alarm'
  trigger:
    - platform: state
      entity_id: binary_sensor.living_room_gas_detector_gas_detection
      to: 'on'
  action:
    - service: light.turn_on
      target:
        entity_id: light.living_room_lights
      data:
        flash: long
        color_name: red
    - service: siren.turn_on
      target:
        entity_id: siren.living_room_zigbee_siren
MQ Sensor Family Comparison Chart
The MQ-2 is a great generalist, but other sensors in the MQ family are specialized for different types of gases. Here’s a quick chart to help you pick the right one for a specific need.
| Sensor | Primary Gases Detected | Common Use Case |
|---|---|---|
| MQ-2 | Smoke, LPG, Propane, Methane, Hydrogen | General-purpose combustible gas and smoke detector. |
| MQ-3 | Alcohol, Ethanol, Benzene | DIY breathalyzers, alcohol vapor detection. |
| MQ-7 | Carbon Monoxide (CO) | Specific detection of carbon monoxide. |
| MQ-135 | Benzene, Alcohol, Smoke, Ammonia, CO2 | General air quality sensor (VOCs). |
Common Troubleshooting Tips
- Sensor not showing up in Home Assistant: First, confirm your ESP32 is connected to your Wi-Fi network. Check the ESPHome logs for any API connection errors.
- Readings are stuck at 0 or a very high, fixed number: Double-check your wiring. A loose GND wire or a bad connection on the A0 pin is the usual culprit. Also, ensure you are powering the sensor with 5V, as 3.3V may not be enough for the internal heater.
- Readings are very unstable: MQ sensors are sensitive to changes in temperature and humidity. They also need that long initial “burn-in” period. If the problem persists, you might have a noisy or poor-quality power supply.
- The `binary_sensor` triggers constantly: Your trigger threshold in the YAML is too low. Watch the `Gas Ratio` sensor values in clean air and adjust the `if (id(mq2_ratio).state > 1.5)` threshold to a value slightly higher than what you normally observe.
Frequently Asked Questions (FAQ)
What physical property does the MQ-2 sensor actually measure?
The MQ-2 is a chemiresistive sensor. Inside is a semiconductor material (tin dioxide, SnO2) whose electrical resistance changes when certain gases are present. A small internal heater keeps this material at an optimal temperature for the reaction. So, what we’re indirectly measuring is a change in resistance, which we then correlate to an approximate concentration of gas in the air.
What’s the difference between the MQ-2 and the MQ-135?
While they look similar, they are optimized for different gases. The MQ-2 is highly sensitive to combustible gases like methane, butane, and propane, making it ideal for detecting gas leaks or smoke. The MQ-135, on the other hand, is designed to measure general air quality, being more sensitive to compounds like ammonia, sulfides, and benzene vapors. That’s why it’s often referred to as an “air quality” or VOC (Volatile Organic Compounds) sensor.
How should I position the sensor for effective detection?
Placement is key. For gases that are heavier than air, like butane or propane (common in gas canisters), the sensor should be installed close to the floor. For gases that are lighter than air, like natural gas (methane) or smoke, which tend to rise, a higher position on the wall is more effective.