
Last updated on April 21, 2026
How to Set Up a VLAN in 2026: The Definitive Guide to Segmenting and Bulletproofing Your Home Network
In the hyper-connected home of 2026, where everything from your fridge to your light bulbs demands a stable and secure connection, a proper VLAN setup on your router is no longer a pro-level luxury—it’s an absolute necessity. The explosion of IoT devices, 8K streaming, remote work, and online gaming requires smart network management. Without proper network segmentation, your entire digital life is like a house with only one front door: if a threat gets through, it has access to everything.
VLANs (Virtual Local Area Networks) are the ultimate solution for creating isolated digital “lanes” within your single physical network. This is the comprehensive guide that will take you from the basic concepts to hands-on implementation on the market’s most popular routers. I’ll show you how to plan, configure, and optimize your VLANs to shield your network from threats, prioritize critical traffic, and bring order to digital chaos. By the end, you won’t just know how to set up a VLAN; you’ll understand the *why* behind every step.
Disclaimer: The content of this article is for educational and informational purposes only. We do not develop or distribute any of the add-ons, software, or services mentioned, nor are we affiliated with their creators. We are against piracy and the use of illegal content. The user is solely responsible for how they use the information provided herein.
What is a VLAN and Why is a VLAN Setup More Crucial Than Ever in 2026?
Imagine your home network is a large apartment building. Without VLANs, all the tenants (your devices) share the same hallway and common areas. The security camera in the lobby, your PC with banking data, your kids’ tablet, and a guest’s console all share the same space. This not only creates digital “noise” and congestion but also poses a massive security risk. If an insecure device, like a cheap smart bulb, gets hacked, the attacker can just “walk down the hall” and try to break into the rest of the “apartments.”
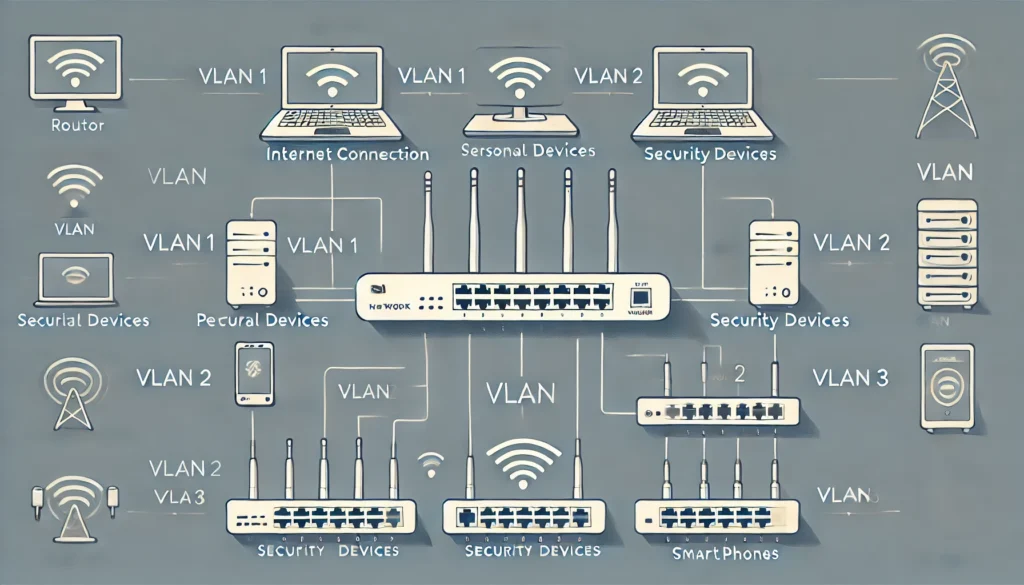
A VLAN lets you build virtual walls. It’s like giving each group of tenants their own private, isolated floor. Here’s how that looks:
- The IoT VLAN (Floor 1): This contains all your cameras, sensors, and smart home gadgets. They are isolated and can’t “see” your main computer.
- The Main VLAN (The Penthouse): This is home to your trusted devices like PCs, laptops, and your NAS. Maximum security and performance.
- The Guest VLAN (Ground Floor): This offers internet access to your visitors but completely blocks them from reaching any other device on your network.
This logical network segmentation is done on the same physical hardware (your router and switches), offering a level of flexibility and security that a traditional flat network can’t even dream of.
Key Advantages of a VLAN Setup in 2026
- Fortified Cybersecurity: This is the number one benefit. By isolating devices, you dramatically reduce your attack surface. A breach of your RTSP camera won’t compromise the data on your NAS. It’s the first line of defense against the risks of a modern home network.
- Optimized Performance: By separating traffic, you prevent the constant “chatter” from IoT devices (broadcasts) from hogging the bandwidth needed for your cloud gaming session or 4K video conference. You can use QoS (Quality of Service) to prioritize traffic on your work or entertainment VLAN.
- Simplified Organization & Management: Grouping devices by function (work, smart home, guests, kids) makes it easy to apply rules. For example, you can cut off internet access to the kids’ VLAN at a specific time or apply content filters just for them.
- Flexibility at No Extra Cost: You don’t need to buy multiple routers. With a single VLAN-capable router and, optionally, a managed switch, you can reorganize your network logically without moving a single cable.
Prerequisites: What You Need to Get Started
Before you dive into the configuration, make sure you have the right tools for the job. Not all gear is created equal.
- A VLAN-Capable Router: This is non-negotiable. The routers provided by your ISP almost never include this feature. You’ll need a mid-to-high-end or prosumer router. Brands like Ubiquiti, MikroTik, Synology, ASUS (with advanced firmware), or those running OpenWrt are the usual suspects.
- (Optional) A Managed Switch: If your router has too few Ethernet ports and you want to extend your VLANs to more wired devices, a managed switch is essential. It can “understand” VLAN tags and direct traffic to the correct port.
- A Network Plan: Before you touch a single setting, grab a piece of paper (or a spreadsheet) and define:
- Which VLANs do you need? (e.g., Main, IoT, Guests, Work).
- What VLAN ID will each have? (A unique number, e.g., Main=10, IoT=20, Guests=30).
- What IP range will each VLAN use? (They must be different subnets, e.g., Main=192.168.10.x, IoT=192.168.20.x, Guests=192.168.30.x).
VLAN Types: Port-Based vs. Tagged (802.1Q)
It’s crucial to understand the two main methods for assigning devices to a VLAN:
1. Port-Based VLANs (Untagged)
This is the simplest method. You assign a physical port on your router or switch to a specific VLAN. Any device you plug into that port automatically belongs to that VLAN. It’s perfect for stationary devices like a desktop PC, a server, or a printer.
- Pro: Easy to set up and understand.
- Con: Inflexible. Each port can only belong to one VLAN.
2. Tagged VLANs (802.1Q)
This is the industry standard and the most powerful method. Every data packet traveling on the network carries a digital “tag” that indicates which VLAN it belongs to. This allows a single cable (a “trunk” link) to carry traffic from multiple VLANs simultaneously. It’s essential for connecting switches together or for assigning different Wi-Fi SSIDs to different VLANs.
- Pro: Extremely flexible and scalable. Allows for multiple VLANs on a single Wi-Fi access point.
- Con: Requires all devices in the link (router, switch, access point) to be 802.1Q compliant.
Comparison Chart: The Best Routers for VLAN Setup in 2026
Choosing the right router is the most important step. Here’s a comparison of my top recommendations for 2026, covering different user profiles.
| Brand/Model | User Profile | Ease of Use | Key Features | Estimated Price Range (2026) |
|---|---|---|---|---|
| Ubiquiti UniFi Dream Machine (UDM) / Gateway | Beginner / Prosumer | Very High | Intuitive GUI, complete ecosystem (switches, APs), constant updates. | $250 – $500 |
| Synology (WRX/RT Series) | Beginner / Prosumer | High | Excellent OS (SRM), user-friendly interface, powerful security and parental controls. | $200 – $450 |
| MikroTik (hEX, RB5009, etc.) | Advanced / Professional | Low | Absolute granular control, unmatched power and flexibility for the price. Steep learning curve. | $70 – $300 |
| ASUS (with Asuswrt-Merlin firmware) | Intermediate / Enthusiast | Medium | Powerful hardware, enhances stock features with third-party firmware that adds robust VLAN support. | $150 – $400 |
| Router with OpenWrt | Enthusiast / Expert | Low | Open-source software you can install on compatible hardware. Maximum customization and control. | Depends on hardware |
How-To Guide: VLAN Setup Step-by-Step (By Brand)
Here are the general steps for the most popular platforms. The exact menu names might change slightly with firmware updates, but the logic remains the same.
1. Configuring VLANs on Ubiquiti UniFi
In my opinion, the UniFi system is the easiest way to get started.
- Log in to your UniFi Network Controller.
- Navigate to Settings > Networks.
- Click Create New Network.
- Give it a name (e.g., “IoT”).
- In the VLAN ID field, enter the number you planned (e.g., 20).
- Configure the IP range in the Gateway IP/Subnet section (e.g., 192.168.20.1/24).
- Save the changes.
- For Wi-Fi: Go to Settings > WiFi, create a new SSID (e.g., “MyHome_IoT”), and in the Network section, select the “IoT” VLAN you just created.
- For physical ports: Go to Devices, select your UniFi switch, go to Ports, choose a port, and under Port Profile, select the “IoT” network.
2. Configuring VLANs on MikroTik (RouterOS)
MikroTik is pure power, but it requires a more technical approach. We’ll use the recommended Bridge VLAN Filtering method.
- Create the Bridge: Go to Bridge and create a new bridge. Add all the physical ports you’ll be using (Ethernet and Wi-Fi) to this bridge’s Ports tab.
- Enable VLAN Filtering: On the Bridge tab, edit the bridge you created and check the VLAN Filtering box.
- Create the VLANs: Go to the VLANs tab. Add a new entry for each VLAN. Specify the VLAN ID and ensure the bridge is “tagged” and the end-device ports are “untagged.” For example, for VLAN 20 (IoT) on port ether3:
/interface bridge vlan add bridge=bridge1 tagged=bridge1 untagged=ether3 vlan-ids=20 - Assign IPs and DHCP: Go to IP > Addresses and add an IP address for each VLAN interface (e.g., 192.168.20.1/24 on the bridge+vlan20 interface). Then, go to IP > DHCP Server and create a DHCP server for each VLAN.
- Create Firewall Rules: In IP > Firewall > Filter Rules, create the rules to allow or deny communication between VLANs. For instance, to block the IoT VLAN from seeing the main one:
/ip firewall filter
add action=drop chain=forward src-address=192.168.20.0/24 dst-address=192.168.10.0/24
3. Configuring VLANs on OpenWrt
OpenWrt gives you total freedom, similar to MikroTik, through its LuCI web interface.
- Log in to the LuCI interface.
- Go to Network > Interfaces. Click the Devices tab.
- Select your main bridge (usually br-lan) and click Configure. Enable the Enable VLAN filtering option.
- In the Bridge VLAN filtering section, add your VLANs. For example, for VLAN 20, add a new entry, put 20 in the VLAN ID, and mark the ports that will belong to it as “untagged” and the CPU port (eth0) as “tagged.”
- Go back to Network > Interfaces and click Add new interface…
- Give it a name (e.g., “vlan_iot”), choose the protocol (Static address), and for Device, select the newly created virtual device (e.g., br-lan.20).
- Assign it an IP (e.g., 192.168.20.1) and set up a DHCP server for this new interface.
- Finally, go to Network > Firewall to configure the zones and communication rules between your new VLANs.
Frequently Asked Questions (FAQ) about VLANs
- Does my ISP-provided router (from Comcast, Verizon, etc.) support VLANs?
- In 99% of cases, no. VLAN functionality is considered an advanced feature, and ISP routers are typically very locked down. The best solution is to put your ISP’s router in bridge mode and use your own compatible router.
- Will setting up VLANs slow down my internet?
- No, quite the opposite. By managing and isolating broadcast traffic, you can actually improve the overall performance of your network, especially if you have a lot of devices. The CPU impact on modern routers is negligible.
- Is a managed switch mandatory?
- It’s not mandatory if you only plan to segment your Wi-Fi networks or if your router’s ports are sufficient. However, if you want to extend segmentation to multiple wired devices in different rooms, a managed switch is the right tool for the job and highly recommended.
- How do I assign a Wi-Fi device to a specific VLAN?
- You create a new SSID (Wi-Fi network name) and “tie” it to the desired VLAN ID. For example, you can have the SSID “MyHome” for your main VLAN and “MyHome_Guest” for your guest VLAN. Any device that connects to “MyHome_Guest” will automatically be on the guest VLAN and subject to its rules.
Conclusion: Your Network, Your Rules
A VLAN setup is one of the most powerful upgrades you can make to your home or small office network. It’s a quantum leap in security, organization, and performance. While it might seem complex at first, especially on platforms like MikroTik, the underlying logic is always the same: plan, create virtual networks, assign them IPs, and define how (and if) they can communicate with each other.
With this guide, you now have the knowledge to transform your flat, vulnerable network into a segmented, efficient fortress, ready for the challenges of today and tomorrow. In my experience, once you get a taste of a well-segmented network, there’s no going back.
Don’t be afraid to experiment! Start with a simple guest VLAN and expand from there. Total control over your digital infrastructure is within your grasp.
Follow Me on YouTube