
This article may contain affiliate links. If you buy through these links, the price is the same for you and the store pays me a small commission that helps keep Tecnoyfoto running.

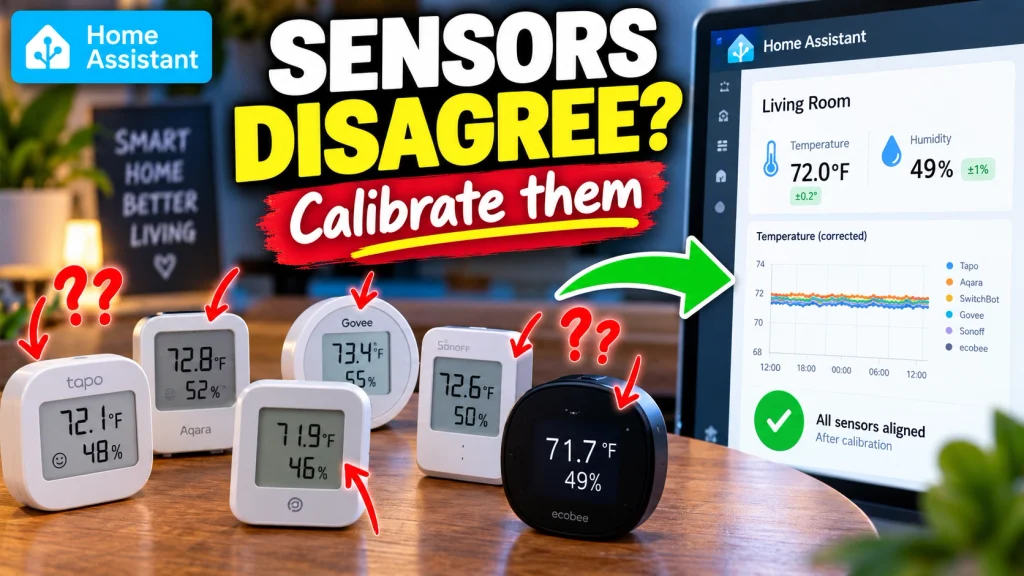
Place two temperature sensors next to each other and one may report 22.3 °C while the other says 22.8 °C. Add a third sensor and you may get another different reading again.
If you have five or six sensors around your home, those small differences can quickly become confusing.
That does not necessarily mean that any of the sensors are faulty. Small differences between domestic temperature and humidity sensors are completely normal, even between units of exactly the same model.
The problem becomes more important when you want to use those values to compare rooms, control heating, measure temperature changes over time, study humidity or create automations in Home Assistant.
In those situations, what matters is having sensors that work from a reasonably consistent reference.
In this guide we are going to see how to compare several sensors properly, how to calculate the correction or offset for each one, and how to apply that calibration using Zigbee2MQTT or directly in Home Assistant.
Why do temperature sensors show different readings?
It is easy to assume that if we buy six identical temperature sensors and place them on the same table, all six should display exactly the same value.
In practice, that is rarely what happens.
Every sensor has manufacturing tolerances. Two apparently identical devices can therefore have a small but consistent difference in their measurements.
There are also other factors involved, such as measurement resolution, reporting intervals and how quickly each sensor reacts to changes in temperature or humidity.
This means that getting six domestic sensors to display exactly the same tenth of a degree at every moment should not be our goal.
What we can do is identify whether a sensor consistently reads higher or lower than our chosen reference and compensate for that difference.
Calibration does not turn a cheap sensor into laboratory equipment
This distinction is important.
If a sensor normally reads 0.5 °C too high, applying a -0.5 °C offset can make its data much more useful.
But that does not suddenly turn it into a precision scientific instrument.
A simple offset mainly corrects a consistent measurement bias.
- It does not fix a sensor that sometimes reads high and sometimes low.
- It does not correct a very slow response time.
- It does not compensate for poor sensor placement.
- It does not remove measurement noise.
- It does not guarantee that the error is identical across the entire temperature range.
For normal home automation, however, correcting a reasonably consistent offset is often more than enough.
First decide what you actually want to achieve
Before changing any values, it helps to distinguish between two different goals.
Goal 1: measure the real temperature as accurately as possible
In this case, you need a reference instrument that you trust more than the sensors you are trying to calibrate.
Ideally, this would be a thermometer or hygrometer with known accuracy that can be used as your reference.
You then compare every smart sensor against that reference and calculate the difference.
Goal 2: make several sensors comparable with each other
This is a different objective and, for many Home Assistant installations, it may actually be the more useful one.
Imagine that you have six sensors around your home and want to compare how quickly different rooms heat up during the afternoon.
It may not matter whether the absolute room temperature is exactly 22.3 °C or 22.5 °C.
What matters is that all six sensors start from the same reasonable baseline so that the differences between rooms are meaningful.
In this situation, consistency can be more important than absolute accuracy.
How to prepare several sensors for calibration
The first step is to bring all the sensors you want to compare into the same location.
They do not need to physically touch each other. In fact, leaving a little space between them is preferable.
Place them somewhere with conditions that are as stable as possible:
- away from direct sunlight;
- away from radiators or heaters;
- away from open windows;
- away from drafts;
- away from electronics that generate heat;
- at approximately the same height.
Then give them time to stabilise.
I would not place six sensors on a table, wait five minutes and immediately use those readings as permanent calibration values.
Leave them together for several hours. If the comparison is important, recording their values over 12 or even 24 hours can be useful.
There is nothing magical about those exact periods. The idea is simply to collect enough readings to see whether the difference is genuinely consistent rather than relying on a single snapshot.
Do not calibrate using a single reading
Imagine checking all six sensors at exactly 6:00 PM.
One sensor may have reported ten seconds ago while another may not have sent an update for several minutes.
Small natural fluctuations can therefore make a single comparison misleading.
A better approach is to observe several readings over time and calculate the typical or average value for each sensor.
For example, after several hours you might obtain something like this:
| Sensor | Average temperature | Required correction |
|---|---|---|
| Reference sensor | 22.4 °C | 0 °C |
| Sensor 2 | 22.9 °C | -0.5 °C |
| Sensor 3 | 22.2 °C | +0.2 °C |
| Sensor 4 | 22.5 °C | -0.1 °C |
The calculation is simple:
Offset = reference value − sensor value
If your reference reads 22.4 °C and another sensor normally reads 22.9 °C:
22.4 − 22.9 = -0.5 °C
The correction for that sensor would therefore be -0.5 °C.
What if I do not have an accurate reference thermometer?
You can still perform a useful relative calibration.
If your main goal is to compare several sensors with each other, you do not necessarily need to know the exact real-world temperature.
You can choose one sensor that you trust as the reference and calibrate the others against it.
Another option is to calculate the typical reading from the entire group.
The median can be particularly useful if one sensor is clearly different from the others because an extreme reading has less influence on the result than it would when using a simple average.
This approach does not guarantee that you have discovered the exact true temperature, but it can make the sensors much more consistent with each other.
How to calibrate temperature and humidity in Zigbee2MQTT
If your sensors are connected through Zigbee2MQTT, this is normally the first place I would check.
Open the device in Zigbee2MQTT and look through its device-specific settings or exposed functions. Depending on the sensor and the version you are using, you may find options named:
temperature_calibration
humidity_calibration
Not every Zigbee device supports these options, so their availability depends on the specific model.
When they are available, the calibration value acts as an offset.
If a sensor reads 0.5 °C too high, enter:
-0.5If it reads 0.3 °C too low, enter:
0.3The same principle applies to relative humidity.
If the sensor normally reports 47% while your chosen reference reports 50%, the required correction would be:
3After saving the calibration, wait for a new sensor report before deciding whether the change has worked.
Some battery-powered Zigbee devices may also need to be woken manually before certain settings can be written to them.
Will Zigbee2MQTT calibration also change the physical display?
Do not assume that it will.
Some calibration options affect the value that Zigbee2MQTT publishes, while other devices may implement calibration inside the device itself.
The exact behaviour therefore depends on the sensor and its firmware.
You may find that Home Assistant shows the corrected value while the LCD screen on the physical sensor continues to display the original reading.
If your objective is to record, compare and automate using Home Assistant, this usually does not matter.
What if my sensor cannot be calibrated in Zigbee2MQTT?
Not every device provides a native calibration option.
In that case, you can leave the original sensor untouched and create a second corrected sensor directly in Home Assistant.
Home Assistant currently allows you to do this from the user interface with a Template helper.
Go to:
Settings → Devices & services → Helpers → Create helper → Template → Template a sensor
For the state template, you can use something like:
{{ states("sensor.living_room_temperature") | add(-0.5, default=0) | round(1) }}Replace sensor.living_room_temperature with your original entity and replace -0.5 with the offset you calculated.
For availability, you can use:
{{ is_number(states("sensor.living_room_temperature")) }}This prevents the corrected sensor from displaying a false numeric value if the original entity becomes unavailable or unknown.
Set the device class to Temperature and select the appropriate temperature unit for your installation.
How to correct humidity in Home Assistant
The process is exactly the same for humidity.
For example, if your humidity sensor needs an offset of +3 percentage points:
{{ states("sensor.living_room_humidity") | add(3, default=0) | round(0) }}You can use this availability template:
{{ is_number(states("sensor.living_room_humidity")) }}Temperature and humidity should always be evaluated independently.
A sensor that needs a -0.5 °C temperature correction does not automatically need any humidity correction at all.
Creating the calibrated sensor with YAML
The graphical interface is enough for most installations, but Home Assistant also allows you to create the corrected sensor using YAML.
template:
  - sensor:
      - name: "Living room temperature calibrated"
        unique_id: living_room_temperature_calibrated
        device_class: temperature
        state_class: measurement
        unit_of_measurement: "°C"
        availability: "{{ is_number(states('sensor.living_room_temperature')) }}"
        state: >
          {{ states('sensor.living_room_temperature')
             | add(-0.5, default=0)
             | round(1) }}
This creates a second entity containing the corrected value while leaving the original sensor unchanged.
If you find old Home Assistant tutorials using the legacy sensor: - platform: template syntax, be aware that the current Template integration uses the template: configuration shown above and can also be configured directly from the interface.
Is it better to calibrate in Zigbee2MQTT or Home Assistant?
Both approaches are valid, but they are useful in slightly different situations.
Calibrating in Zigbee2MQTT
This would normally be my first option when the device supports it and I want to use the corrected reading throughout Home Assistant.
The main advantage is simplicity: Home Assistant receives the already-adjusted reading and you do not need to create an additional entity.
Creating a Template Sensor in Home Assistant
This is particularly useful when the Zigbee device has no calibration feature or when you deliberately want to keep both the raw value and the corrected value.
Keeping both can also be useful while testing because you can compare the two entities before deciding whether your chosen offset is correct.
Calibration does not rewrite your historical data
This is worth remembering if you use Home Assistant to analyse temperature over long periods.
Applying a calibration today does not automatically recalculate every measurement that Home Assistant recorded during the previous months.
The correction affects new readings from that point onward.
You may therefore see a small step in the historical graph at approximately the moment when the offset was introduced.
If you create an entirely new Template Sensor, that new entity will also start building its own history from the time it is created.
Check the sensors again after calibration
I would not consider the job finished immediately after entering the offsets.
Leave the sensors together again and observe them for several more hours.
If the differences have been reduced and each sensor now remains reasonably close to your chosen reference, the calibration is probably good enough for home automation.
If one sensor continues behaving very differently, the problem may not be a simple fixed offset.
For example, imagine that a sensor reads 0.8 °C too high around 20 °C but 0.4 °C too low around 28 °C.
A single offset cannot perfectly correct both situations.
You do not need to turn your home into a calibration laboratory, but it is useful to understand the limits of what a simple offset can correct.
Sensor placement matters just as much as calibration
You can calibrate six sensors perfectly while they are sitting together on a table.
Then you place one above a radiator, another beside a window and another behind a television, and suddenly they all show different temperatures again.
That is no longer a calibration problem.
Those sensors are genuinely measuring different local environments.
If you want to compare rooms or create temperature-based automations, try to install sensors in equivalent locations that genuinely represent the room conditions you want to measure.
Do not chase every tenth of a degree
This is probably one of the easiest mistakes to make once you start calibrating several sensors.
After applying your offsets, one sensor may show 22.4 °C while another shows 22.5 °C.
That does not mean you need to recalibrate everything again.
Different devices may report at slightly different times and may react to environmental changes at slightly different speeds.
The real objective is to remove meaningful, consistent bias that could affect your comparisons and automations, not to force every consumer sensor to display the exact same decimal value at all times.
Practical example: comparing temperature rise between rooms
Imagine that you have three rooms and want to study how much each one heats up during the afternoon.
Before calibration, you discover the following differences when the sensors are placed together:
| Sensor | Measurement bias |
|---|---|
| Room 1 | 0.0 °C |
| Room 2 | +0.6 °C |
| Room 3 | -0.3 °C |
If you use those values without correction, some of the apparent temperature difference between rooms comes from the sensors themselves rather than from the rooms.
After applying the appropriate offsets, you can compare how each room changes over time much more meaningfully.
This is a perfect example of a situation where consistency between sensors may matter more than knowing the absolute room temperature with scientific precision.
Frequently asked questions about sensor calibration in Home Assistant
Can I calibrate a Zigbee temperature sensor in Home Assistant?
Yes. If Zigbee2MQTT provides a calibration option for your particular device, you can apply the offset there. If it does not, you can create a Template Sensor in Home Assistant containing the corrected value.
Do all Zigbee sensors support temperature_calibration?
No. Support depends on the specific device and how it is implemented in Zigbee2MQTT. Some sensors expose temperature and humidity calibration options while others only provide the measured values.
Does Zigbee2MQTT calibration change the sensor’s display?
Not necessarily. The behaviour depends on the device. The corrected value may only affect what Zigbee2MQTT publishes, while the physical screen can continue showing the uncorrected value.
Should I calibrate humidity as well?
Only if you detect a reasonably consistent humidity offset. Temperature and humidity should be evaluated separately.
Which sensor should I use as the reference?
If you own a thermometer whose accuracy you know and trust, use that. If your goal is only to make several smart-home sensors consistent with one another, you can choose one reliable sensor or use a representative value from the group.
How long should I leave the sensors together before calibrating them?
There is no universal fixed period. Several hours is far more useful than a single reading, and 12 to 24 hours can provide a better picture if you want to check whether the difference remains consistent over changing conditions.
Do I need to recalibrate the sensors regularly?
Not necessarily. But if the measurements are important for comparisons or automations, it is sensible to place the sensors together occasionally and confirm that none of them has developed a significant new offset.
Conclusion
Several temperature or humidity sensors showing different values in the same room does not automatically mean that one of them is broken.
The important question is what you need those measurements for.
If your goal is to compare rooms, study temperature trends or use the data in Home Assistant automations, correcting consistent measurement bias can make your sensors much more useful.
Start by placing the sensors together under stable conditions, observe multiple readings instead of relying on a single value, calculate the offset for each device and apply the correction in Zigbee2MQTT when your hardware supports it.
If your sensor does not provide a calibration option, Home Assistant’s Template helpers offer a straightforward way to create a corrected entity without modifying the original sensor.
And above all, do not try to force several domestic sensors to agree to the last decimal place every second of the day.
The goal is not to build a metrology laboratory. The goal is to obtain data that is consistent and reliable enough for your smart home to use in a meaningful way.
Continue reading

Next related guide · 8 min read
Aqara Rain Sensor in Home Assistant: Is It Still Worth Using?
This was my first rain sensor for Home Assistant. I built it using an Aqara water leak sensor and a simple resistive rain plate…
Continue with this article