
As an Amazon Associate, I earn from qualifying purchases. En calidad de Afiliado de Amazon, obtengo ingresos por las compras adscritas que cumplen los requisitos aplicables. If you buy through these links, the price is the same for you and Amazon pays me a small commission that helps keep Tecnoyfoto running.
Last updated on March 24, 2026
If you’re looking for the ultimate guide on how to install Shelly Plus 1, you’ve come to the right place. In this fully updated 2026 guide, I’ll walk you step-by-step through the wiring, initial setup, and integration with the most popular smart home ecosystems. Forget outdated info; this is the only reference you’ll need.
For years, the original Shelly 1 was my go-to smart relay because of its incredible versatility. I’ve used it for everything from automating my garage door to making standard light switches smart. But time moves on, and tech evolves. Today, in 2026, the Shelly Plus 1 has cemented its place as the de facto standard, thanks to some serious upgrades. But has the installation process changed? Let’s dive in and find out.

Shelly 1 “Classic” vs. Shelly Plus 1: A 2026 Tech Showdown
Before we touch any wires, it’s crucial to understand why the Shelly Plus 1 is the superior choice in 2026. While the original model still works, the improvements in the Plus 1’s performance, security, and ease of use are undeniable. Here’s a comparison chart to clear up any doubts:
| Feature | Shelly 1 (Classic) | Shelly Plus 1 |
|---|---|---|
| Processor | ESP8266 | ESP32Affiliate link (Much faster) |
| Connectivity | Wi-Fi 2.4 GHz | Wi-Fi 2.4 GHz + Bluetooth 4.2 (for quick setup) |
| DC Power | 12V / 24-60V (Requires Jumper) | 12V / 24-48V (Dedicated terminal, No Jumper) |
| Dry Contacts | Yes | Yes (Potential-free) |
| Security | Basic (WPA2) | Advanced (TLS, Secure MQTT, Overheating Protection) |
| Scripting | No | Yes, via mJS |
| Matter Support | No | Yes (Via firmware update) |
| Shelly Plus 1 Price (Est. 2026) | ~$15-18 (Hard to find new) | ~$20-25 |
Safety First: A Critical Warning for 2026
Before you even think about touching a wire, let’s get serious. Working with mains voltage (120V AC in the US) is extremely dangerous and can cause severe injury or death. If you are not 100% confident in your knowledge and skills, hire a licensed electrician. Always, always, always turn off the power at your main circuit breaker panel before handling any wiring. All installations must comply with the National Electrical Code (NEC) and your local regulations. Understanding what a circuit breaker does and the importance of proper grounding is essential for a safe installation.
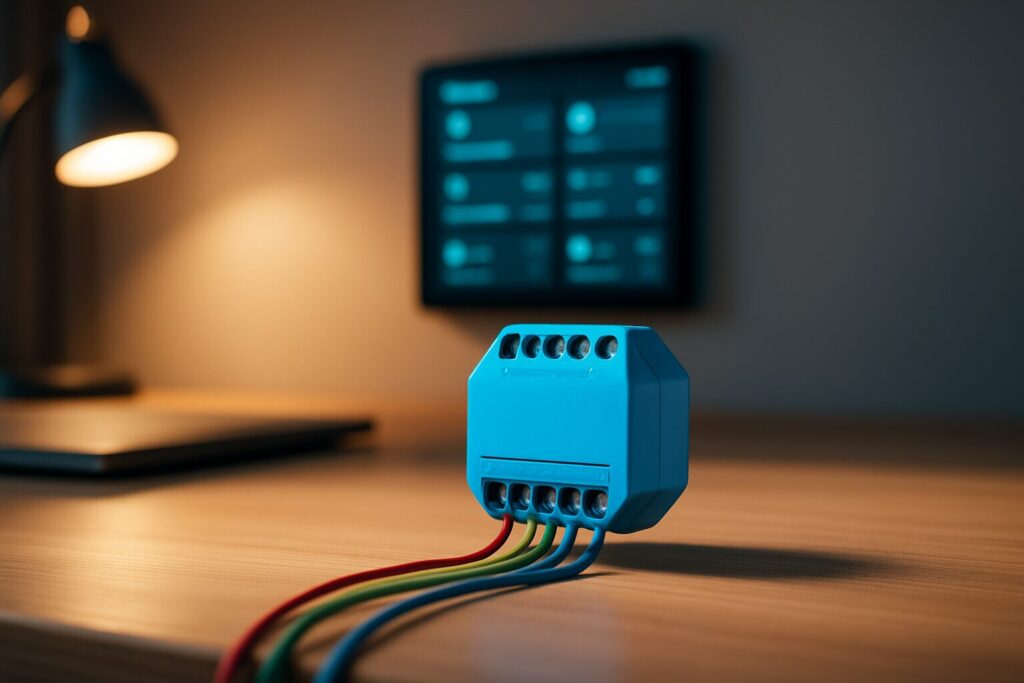
Shelly Plus 1 Wiring: Diagrams and Step-by-Step Guide
The heart of this tutorial is the Shelly Plus 1 wiring. Thankfully, Shelly’s official diagrams are quite clear and will be our foundation. Here’s how to adapt them for the two most common use cases.
Case 1: Installing Behind a Light Switch (AC Power)
This is the most popular scenario: making a standard wall switch smart without losing its manual functionality. For this project, you’ll need both a Hot and a Neutral wire in your switch box. While common in modern construction, older homes might not have a neutral wire available, so check first!
As you can see in the comparison diagram, the Shelly Plus 1 wiring diagram for AC power is identical to the original model. Here are the connections based on US wire colors:
- L (Line): Connect to the Hot wire (usually black).
- N (Neutral): Connect to the Neutral wire (always white).
- O (Output): Connect to the load wire going to the light bulb.
- SW (Switch): Connect to the terminal on the physical wall switch.

The main advantage of the Plus 1 here isn’t the wiring itself, but its faster processor, which delivers a near-instant response from both the app and the physical switch.
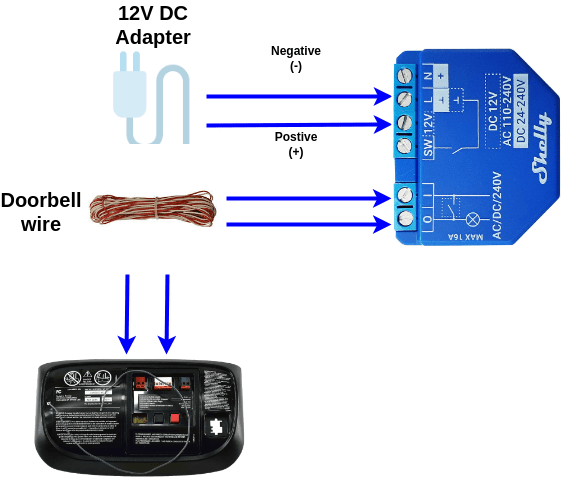
Case 2: Garage Door Opener (DC Power & Dry Contacts)
This is where the Shelly Plus 1 truly shines and simplifies the installation. To control a garage door opener, we typically use the relay’s dry contacts to simulate a push-button press. We power the Shelly using the opener’s own low-voltage electronics, which usually run on 12V or 24V DC.

On the original Shelly 1, you had to move a tiny internal jumper to switch it to DC power mode. This was an easy step to forget and a common source of errors that could fry the device.
The Shelly Plus 1 eliminates this headache. As shown in the diagram, it now has a dedicated “12V +” terminal. No more jumper! This makes the Shelly Plus 1 wiring for DC applications safer and more straightforward:
- +12V: Connect to the positive (+) terminal of the 12V DC power source from your garage door opener.
- N / -: Connect to the negative (GND) terminal of the 12V DC source.
- I (Input) and O (Output): Connect to the two terminals for the push button on your garage door opener. The order doesn’t matter, as you’re simply closing a circuit.
Shelly Plus 1 Setup: First Steps in 2026
Once the wiring is complete, it’s time for the Shelly Plus 1 setup. Thanks to Bluetooth, the process is now easier than ever:
- Power It On: Restore power to the circuit. The Shelly Plus 1 will create its own Wi-Fi access point and enable Bluetooth.
- Use the Shelly Smart Control App: Open the app on your smartphone. It will automatically detect the new device nearby via Bluetooth.
- Add to Your Network: Follow the on-screen prompts to connect the Shelly to your 2.4 GHz Wi-Fi network.
- Update Firmware: This is a crucial step! As soon as it’s configured, check for and install the latest firmware update. This ensures you have the latest features, security patches, and stability improvements.
Integration with Home Assistant, Alexa, and Google Home
A smart device doesn’t live in a vacuum. In 2026, seamless integration is everything. The Shelly Plus 1 excels here:
- Home Assistant: The integration is native and runs entirely on your local network—no cloud required. Just navigate to “Devices & Services” in your Home Assistant instance, and it will be auto-discovered. It’s one of the most reliable integrations out there.
- Alexa and Google Home: Linking is done through the Shelly Cloud skill. Once you connect your account, your devices will automatically appear in your Alexa or Google Home apps, ready for voice control.
- Matter: Shelly has been updating its Plus line devices to be compatible with Matter. This makes the Shelly Plus 1 a future-proof investment, ensuring it will work with all major ecosystems for years to come.
Alternatives to Shelly Plus 1 in 2026
While the Shelly Plus 1 is a fantastic choice, other compelling alternatives exist. If your smart home is built primarily around Zigbee, you might consider relays like the Sonoff ZBMINI. The main advantage of Zigbee is that it creates a mesh network, improving coverage and reliability, especially with many devices. The downside is that it requires a Zigbee coordinator. If you want to learn more, I highly recommend our ultimate guide to Zigbee2MQTT in Home Assistant.
Final Thoughts
So there you have it. This guide has shown you not only how to install Shelly Plus 1 but also why it remains one of the best choices for DIY smart home projects in 2026. It’s faster, more secure, and easier to install than its predecessor, especially for low-voltage applications. In my opinion, the improved DC wiring alone is worth the small price difference.
The price of the Shelly Plus 1 typically hovers around $20-25, depending on the retailer and current sales. You can find it on AmazonAffiliate link or the official Shelly website. Pro tip: buying them in two-packs or four-packs often brings down the cost per unit.