
If you want a flexible, local, and well-supported Zigbee setup in Home Assistant, Zigbee2MQTT is one of the strongest options available in 2026. It supports a very large device catalog, exposes detailed device features, and gives you excellent tools for managing and troubleshooting your Zigbee network.
Last updated on June 16, 2026
June 2026 update: corrected the Home Assistant Apps navigation, replaced the old Zigbee2MQTT repository address, and updated the installation process to match the current onboarding flow.
This guide covers the complete process: choosing a coordinator, installing Mosquitto, installing the official Zigbee2MQTT app, completing the onboarding wizard, pairing devices, migrating from ZHA, and solving common problems.
Before you begin: the Home Assistant app method in this guide is intended for Home Assistant OS and Home Assistant Supervised. The current Zigbee2MQTT Home Assistant app supports 64-bit systems, and a Raspberry Pi 4 or newer is recommended.
Zigbee2MQTT or ZHA: Which One Should You Choose?
ZHA is built directly into Home Assistant and is usually the simpler option for a first Zigbee network. Zigbee2MQTT requires an MQTT broker and one extra application, but it gives advanced users more visibility and control.
- Broad device support: Zigbee2MQTT supports a very large catalog and often adds support for new or unusual devices quickly.
- Detailed device controls: its frontend exposes device features, reporting, bindings, groups, logs, OTA updates, and network information in one place.
- MQTT flexibility: MQTT makes it easier to inspect messages and connect Zigbee2MQTT to other compatible automation platforms.
- Separate service: when Zigbee2MQTT is installed as a Home Assistant app, restarting Home Assistant Core does not normally stop the Zigbee2MQTT app. However, Home Assistant automations and dashboards still depend on Home Assistant being available.
Important: ZHA and Zigbee2MQTT cannot control the same coordinator at the same time. You can run both in one Home Assistant installation, but each must use its own coordinator and its own Zigbee network.
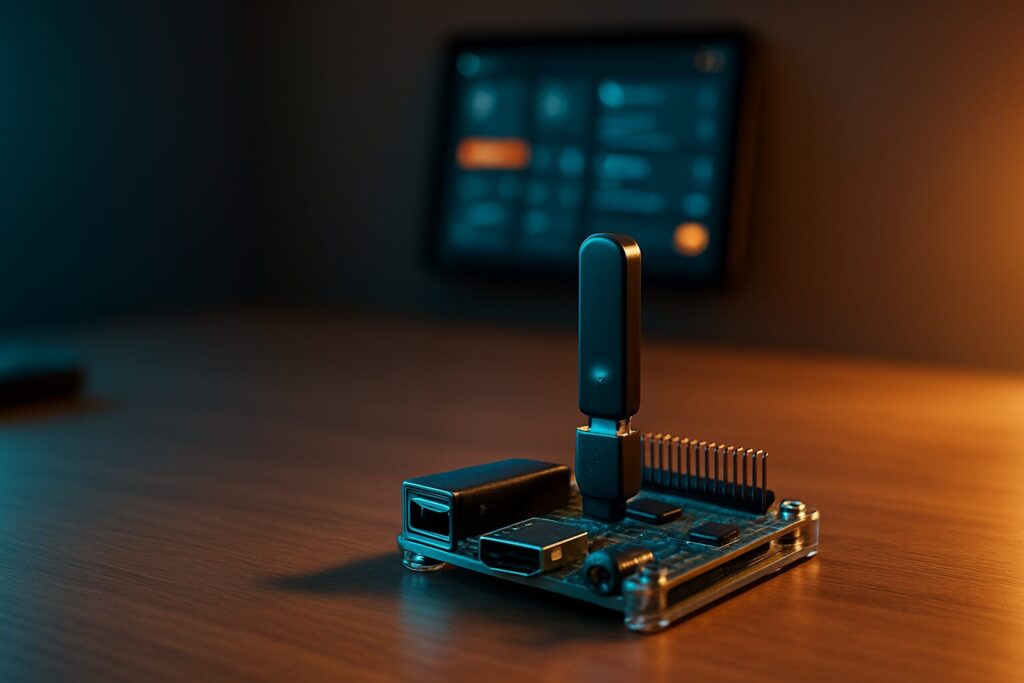
Choosing a Zigbee Coordinator in 2026
The coordinator is the central radio that creates and manages your Zigbee network. A good coordinator, correct placement, and a healthy mesh are more important than simply choosing ZHA or Zigbee2MQTT.
| Coordinator | Connection | Advantages | Points to Consider |
|---|---|---|---|
| SONOFF ZBDongle-P | USB | Reliable Texas Instruments chipset, mature support, affordable, large community | Use a USB extension cable and keep it away from USB 3.0 ports, SSDs, Wi-Fi access points, and metal cases |
| SONOFF ZBDongle-E | USB | Modern Silicon Labs chipset, officially supported by Zigbee2MQTT, good performance | Uses the ember adapter driver; keep its firmware current and use a USB extension cable |
| SMLIGHT SLZB-06 | Ethernet / PoE | Can be placed centrally, does not need to be beside the Home Assistant server, clean PoE installation | Reserve a fixed IP address and prefer wired Ethernet over Wi-Fi for the serial connection |
My practical recommendation: a USB coordinator is still an excellent choice when the Home Assistant server is in a good central location. If your server is hidden in a cabinet, rack, basement, or corner of the house, an Ethernet coordinator gives you much more freedom to place the Zigbee radio where it makes sense.
Step 1: Install Mosquitto Broker
Zigbee2MQTT communicates with Home Assistant through MQTT. The easiest option on Home Assistant OS or Supervised is the official Mosquitto broker app.
- Go to Settings > Apps.
- Click the Add button in the bottom-right corner to open the App Store.
- Search for Mosquitto broker, install it, and start it.
- Enable Start on boot and Watchdog.
- Go to Settings > People > Users and create a dedicated user for Zigbee2MQTT, for example
mqtt_user. Do not use the reserved usernameshomeassistantoraddons. - If the Users section is not visible, enable Advanced Mode in your Home Assistant profile.
- Go to Settings > Devices & services. If the MQTT integration is discovered, configure it and enable MQTT discovery.
Keep the MQTT username and password available. You will enter them during the Zigbee2MQTT onboarding process.
Step 2: Add the Official Zigbee2MQTT Repository
- Return to Settings > Apps and click Add to open the App Store.
- Open the three-dot menu and select Repositories.
- Add this official repository address exactly as shown:
https://github.com/zigbee2mqtt/hassio-zigbee2mqtt - Close the repository window and refresh the App Store if necessary.
- Install the stable Zigbee2MQTT app. The Edge version is intended for testing development builds and is not the right choice for most homes.
Step 3: Start Zigbee2MQTT and Complete Onboarding
The current Zigbee2MQTT app uses an onboarding page on the first start. This is now the recommended setup method.
- Start the Zigbee2MQTT app.
- Open its Web UI. The first screen should be the onboarding wizard.
- Under the MQTT settings, use
mqtt://core-mosquitto:1883as the server and enter the dedicated MQTT username and password created earlier. - Select your coordinator under Found devices. Zigbee2MQTT will normally fill in the coordinator path and adapter type automatically.
- Select the nearest 2.4 GHz Wi-Fi channel when requested. This helps the wizard suggest a suitable Zigbee channel.
- Make sure the Home Assistant integration and the Zigbee2MQTT frontend are enabled.
- Submit the configuration and allow Zigbee2MQTT a few seconds to start.
If the page briefly shows 502 Bad Gateway, wait a little and refresh it. If it remains unavailable for more than about two minutes, open the app log and check the exact error.
Manual Adapter Configuration if Detection Fails
Automatic detection is the easiest option. Only configure the adapter manually if Zigbee2MQTT cannot find it. These examples show the relevant values used in the Zigbee2MQTT configuration.
SONOFF ZBDongle-P:
serial:
  port: /dev/serial/by-id/usb-YOUR_DONGLE_PATH
  adapter: zstack
SONOFF ZBDongle-E:
serial:
  port: /dev/serial/by-id/usb-YOUR_DONGLE_PATH
  adapter: ember
SMLIGHT SLZB-06 over Ethernet:
serial:
  port: tcp://192.168.1.50:6638
  adapter: zstack
For a USB coordinator, use the stable /dev/serial/by-id/... path rather than a temporary path such as /dev/ttyUSB0 whenever possible. You can find the hardware path under Settings > System > Hardware > All hardware.
The essential MQTT and Home Assistant settings should be equivalent to:
mqtt:
  base_topic: zigbee2mqtt
  server: mqtt://core-mosquitto:1883
  user: your_mqtt_user
  password: 'your_mqtt_password'

homeassistant:
  enabled: true

frontend:
  enabled: true
Note: the Home Assistant app and onboarding interface may display these values as individual fields rather than one complete YAML block.
Step 4: Pair Your Zigbee Devices
- Open the Zigbee2MQTT web interface.
- Click Permit join (All) in the top-right corner. The network will remain open for a limited time.
- Factory reset the Zigbee device or put it into pairing mode using the manufacturer’s instructions.
- Wait for Zigbee2MQTT to complete the device interview.
- Give the device a clear friendly name and assign it to the correct area in Home Assistant.
- Close permit join when you have finished pairing.
If MQTT discovery is enabled and homeassistant.enabled is set to true, the device and its entities should appear automatically in Home Assistant.
How to Migrate from ZHA to Zigbee2MQTT
There is no universal one-click migration from ZHA to Zigbee2MQTT. In most cases, devices must be factory reset and paired again. Plan the migration carefully, especially if your current Zigbee devices are used by important automations.
Option A: Reuse the Same Coordinator
This option costs nothing, but it creates more downtime because ZHA and Zigbee2MQTT cannot use the same coordinator simultaneously.
- Create a full Home Assistant backup.
- Record every device, area, entity ID, automation, dashboard card, scene, and script that depends on ZHA.
- Disable ZHA and make sure it has released the coordinator before starting Zigbee2MQTT.
- Configure Zigbee2MQTT with that coordinator.
- Factory reset and pair the devices again, starting with mains-powered routers before battery devices.
- In Home Assistant, rename the new entity IDs manually where necessary. Matching the friendly name in Zigbee2MQTT does not guarantee that Home Assistant will reuse the old entity ID.
- Test every automation, scene, script, and dashboard before deleting the old ZHA configuration.
Option B: Use a Second Coordinator
This is usually the safest migration method. ZHA and Zigbee2MQTT can run at the same time when each uses a different coordinator and a separate Zigbee network. You can then move devices one by one without taking the complete home offline.
- Keep the existing ZHA network running.
- Install a second coordinator for Zigbee2MQTT.
- Move mains-powered routers first so the new Zigbee2MQTT mesh has a solid base.
- Move battery devices gradually and update their Home Assistant entity IDs and automations.
- Remove ZHA only after the migration has been fully tested.
Advanced Configuration and Maintenance
OTA Firmware Updates
Zigbee2MQTT can provide over-the-air firmware updates for supported devices. Availability depends on the exact manufacturer and model. Before applying an update, read the release notes and avoid updating every device at once. A firmware update can fix problems, but it can also change device behaviour or introduce new compatibility issues.
Zigbee Groups
For several bulbs or switches that should react together, create a Zigbee group in Zigbee2MQTT. A group command can improve synchronization and reduce the number of individual commands sent from Home Assistant. It does not make every response literally instantaneous, but it is often smoother and more consistent than controlling each device separately.
Network Map and Link Quality
The network map is useful for seeing which devices act as routers and how the mesh is connected, but it is only a snapshot. Sleeping battery devices may be missing from the map even when they are working correctly.
Do not judge network health from one LQI value or from the colour of one line. LQI and RSSI are reported differently by different chipsets and manufacturers and can be misleading. Real symptoms such as delayed commands, failed messages, frequent dropouts, and unstable routes are more important than chasing a specific number.
Backups
Create regular Home Assistant backups and make sure the Zigbee2MQTT app data is included. The Zigbee network information is stored both in the coordinator and in Zigbee2MQTT’s data files, so keeping the application data is essential when moving or restoring an installation.
Common Troubleshooting Questions
A short 502 message immediately after starting the app can be normal. Wait a few seconds and refresh. If it continues for more than about two minutes, check the Zigbee2MQTT app log. Common causes include an incorrect adapter path or type, invalid MQTT credentials, another integration such as ZHA already using the coordinator, or an unreachable Ethernet coordinator.
The most common causes are interference, poor coordinator placement, unreliable routers, or a weak mesh. Use a USB extension cable, keep the coordinator away from USB 3.0 devices, SSDs, Wi-Fi access points, and metal cases, and add good mains-powered Zigbee routers that remain powered at all times. Do not change the Zigbee channel casually: the best channel depends on your local Wi-Fi environment, and changing it can require some devices to be paired again.
Check that permit join is enabled, confirm that the device has been factory reset, and follow the pairing instructions for the exact model. Replace the battery if necessary and try pairing close to the coordinator or through a suitable router near the device’s final location. Also check that the model is supported by Zigbee2MQTT.
Zigbee2MQTT has lost communication with the coordinator. For USB devices, check the extension cable, USB port, power supply, firmware, and hardware path. For Ethernet coordinators, check the network cable, fixed IP address, power supply, and TCP port. Also make sure no other application or integration is trying to use the same coordinator.
Confirm that the MQTT integration is configured in Home Assistant, MQTT discovery is enabled, and the Zigbee2MQTT Home Assistant integration is enabled with homeassistant.enabled: true. Then check the Mosquitto and Zigbee2MQTT logs for authentication or discovery errors.
No. One coordinator must be dedicated to one Zigbee application and one Zigbee network. You can run ZHA and Zigbee2MQTT together in Home Assistant only when each uses a separate coordinator.
Did this guide help you? If you are still having trouble choosing a coordinator, connecting Mosquitto, or pairing a specific device, leave a comment with the coordinator model and the exact error shown in the Zigbee2MQTT log.
Follow Me on YouTube
