
As an Amazon Associate, I earn from qualifying purchases. En calidad de Afiliado de Amazon, obtengo ingresos por las compras adscritas que cumplen los requisitos aplicables. If you buy through these links, the price is the same for you and Amazon pays me a small commission that helps keep Tecnoyfoto running.

Updated August 2, 2026.
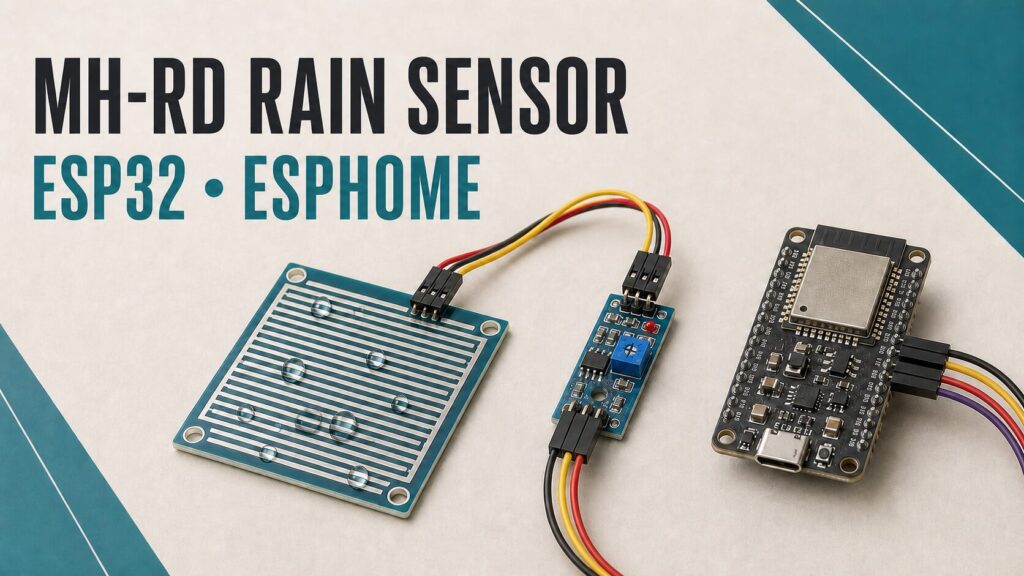
The MH-RD rain sensor is an inexpensive way to detect when a surface starts getting wet and send that information to Home Assistant. In this guide, we will connect it to an ESP32, read its digital and analog outputs with ESPHome, and create a plate-wetness indicator plus two useful sensors for tracking the most recent rain.
Important: the MH-RD is not a rain gauge. It cannot measure millimetres of rain, rainfall rate, or total precipitation. Its analog output can only provide a calibrated estimate of how wet the plate is.
The same principle can be used to detect leaks or flooding, although a purpose-built leak sensor is a better choice for a permanent installation. Everything in this project runs locally through ESPHome and Home Assistant.
What the MH-RD module includes

The kit consists of a board with exposed conductive tracks and a small comparator module, usually built around an LM393. The module provides:
- DO or D0: digital output. It changes state when the threshold selected with the potentiometer is crossed.
- AO or A0: analog output. Its voltage changes with the conductivity of the plate.
- VCC and GND: module power connections.
The digital output is the best choice for automations such as closing a window or retracting an awning. The analog output can display a relative wetness estimate, but the reading is affected by dirt, temperature, corrosion, dew, and how water droplets are distributed.
Parts required
- An MH-RD rain sensorAffiliate link or a compatible module such as the YL-83Affiliate link.
- An ESP32 development boardAffiliate link. The main example uses a classic ESP32-WROOM-32.
- Dupont jumper wiresAffiliate link.
- A USB power supply and an IP65 enclosure for the ESP32 and comparator module. Leave the sensing plate exposed and slightly tilted so it can drain and dry.
Some purchase links are affiliate links. They do not change your price and help support this website.
Safe ESP32-WROOM-32 wiring
Power the MH-RD module from 3.3 V. This keeps its outputs within the ESP32 logic level. Do not connect AO to the ESP32 ADC while powering the module from 5 V unless you have first checked the maximum output voltage and added a suitable divider or protection if required.
| MH-RD | ESP32-WROOM-32 | Purpose |
|---|---|---|
| VCC | 3V3 | 3.3 V power |
| GND | GND | Common ground |
| DO | GPIO36 | Digital rain detection |
| AO | GPIO39 | ADC1 analog reading |
GPIO36 and GPIO39 are input pins on a classic ESP32, which makes them suitable for this circuit. Do not copy these pins to an ESP32-C3, C6, S2, or S3 because each family has a different pin map.

Current ESPHome configuration
This example uses the digital output for rain detection and the analog output for a calibrated plate-wetness percentage. Replace the two calibration points with measurements from your own plate.
substitutions:
  device_name: rain-sensor
  friendly_name: Rain sensor
  rain_digital_pin: GPIO36
  rain_analog_pin: GPIO39

esphome:
  name: ${device_name}
  friendly_name: ${friendly_name}

esp32:
  board: esp32dev
  framework:
    type: esp-idf

logger:

api:
  encryption:
    key: !secret api_encryption_key

ota:
  - platform: esphome
    password: !secret ota_password

wifi:
  ssid: !secret wifi_ssid
  password: !secret wifi_password
  ap:
    ssid: "Rain sensor recovery"
    password: !secret fallback_password

captive_portal:

binary_sensor:
  - platform: gpio
    id: rain_detected
    name: "Rain detected"
    device_class: moisture
    pin:
      number: ${rain_digital_pin}
      inverted: true
      mode:
        input: true
    filters:
      - delayed_on: 2s
      - delayed_off: 30s

sensor:
  - platform: adc
    id: rain_plate_voltage
    pin: ${rain_analog_pin}
    attenuation: auto
    update_interval: 5s
    internal: true
    filters:
      - median:
          window_size: 7
          send_every: 4
          send_first_at: 3

  - platform: copy
    source_id: rain_plate_voltage
    name: "Rain plate wetness"
    unit_of_measurement: "%"
    device_class: moisture
    state_class: measurement
    accuracy_decimals: 0
    filters:
      - calibrate_linear:
          - 3.10 -> 0
          - 1.20 -> 100
      - clamp:
          min_value: 0
          max_value: 100
ESPHome removed the old API password authentication. Home Assistant communication now uses a unique key under api.encryption.key, and OTA uses a platform list. Keep the Wi-Fi credentials, API key, and passwords in secrets.yaml; never publish them inside a device configuration.
Calibrating the wetness percentage
- Temporarily change
internal: truetofalseunderrain_plate_voltage. - Clean and completely dry the plate. Wait for several readings and record the stable voltage. This is the 0% point.
- Wet the plate evenly without immersing the comparator module. Record the stable voltage for the 100% point.
- Replace
3.10and1.20with your readings, then make the voltage sensor internal again.
The voltage decreases as the plate gets wetter on many modules, but verify this on yours. The resulting percentage is a relative plate scale, not rainfall intensity.
Home Assistant Gauge card
Add a manual dashboard card and change the entity ID if Home Assistant generated a different one:
type: gauge
entity: sensor.rain_plate_wetness
name: Plate wetness
unit: "%"
needle: true
min: 0
max: 100
segments:
  - from: 0
    color: green
    label: Dry
  - from: 25
    color: "#039BE5"
    label: Damp
  - from: 60
    color: orange
    label: Wet
  - from: 85
    color: red
    label: Very wet
Store the last rain time and count dry days
The following block uses Home Assistant’s current template: integration. It stores the moment when the detector changes from wet to dry and calculates the elapsed days. Change binary_sensor.rain_detected if your entity has a different ID.
template:
  - triggers:
      - trigger: state
        entity_id: binary_sensor.rain_detected
        from: "on"
        to: "off"
    sensor:
      - name: "End of last rain"
        unique_id: end_of_last_rain
        device_class: timestamp
        icon: mdi:weather-rainy
        state: "{{ now().isoformat() }}"

  - sensor:
      - name: "Days since last rain"
        unique_id: days_since_last_rain
        unit_of_measurement: "d"
        state_class: measurement
        icon: mdi:calendar-clock
        availability: >
          {{ is_state('binary_sensor.rain_detected', 'on')
             or (states('sensor.end_of_last_rain')
                 | as_datetime(default=none)) is not none }}
        state: >
          {% if is_state('binary_sensor.rain_detected', 'on') %}
            0
          {% else %}
            {% set last = states('sensor.end_of_last_rain')
                          | as_datetime %}
            {{ (now() - last).days }}
          {% endif %}
Keep the first template: line when adding this directly to configuration.yaml. If you already load templates.yaml with template: !include templates.yaml, paste only the list items that begin with a dash. Always run the Home Assistant configuration check before restarting.
FireBeetle 2 ESP32-C6 variant
The old platform: ESP32 syntax and the firebeetle32c6 identifier should no longer be used. A FireBeetle 2 ESP32-C6 can declare the ESP32-C6 variant directly, with its 4 MB flash size and ESP-IDF. The example below reads only DO; select a free GPIO and verify it against the pinout for your board revision.
esphome:
  name: rain-sensor-c6
  friendly_name: Rain sensor C6

esp32:
  variant: esp32c6
  flash_size: 4MB
  framework:
    type: esp-idf

# Add wifi, logger, api, ota and captive_portal here
# using the secure syntax from the main example.

binary_sensor:
  - platform: gpio
    name: "Rain detected"
    device_class: moisture
    pin:
      number: GPIO4
      inverted: true
      mode:
        input: true
    filters:
      - delayed_on: 2s
      - delayed_off: 30s
Do not connect the analog output to the same pin used in the WROOM example. Consult the FireBeetle documentation and choose a valid ESP32-C6 ADC pin if you also want the wetness reading.
Reducing corrosion and false alarms
- Install the plate at an angle to help it drain, and keep the comparator module protected from water.
- Clean the tracks regularly. Dust, leaves, salt, and droppings can change the reading.
- Increase
delayed_onif dew causes alerts, and adjustdelayed_offif the detector returns to dry too quickly. - Continuous DC power accelerates electrolysis. For a long-term installation, power the module only during a reading through a correctly designed transistor or MOSFET switch, or use a capacitive rain detector.
- Do not rely on this hobby project as the only protection for people, buildings, or expensive equipment.
Conclusion
The MH-RD is a useful low-cost detector for the beginning of rain when it is powered and calibrated correctly. The digital output provides the clearest automation signal, while the analog channel adds a visual wetness reference rather than a precipitation measurement. With current YAML, separate secrets, and modern templates, the project integrates cleanly and locally with Home Assistant.
For more ESPHome projects, see the HC-SR04 distance sensor guide, the DS18B20 1-Wire guide, or the MQ-2 sensor with ESP32.
Follow Tecnoyfoto on YouTube

Continue reading
Next related guide · 7 min read
MQ-2 Sensor with ESPHome and ESP32: Safe Updated Guide
Updated August 1, 2026. The ADC wiring, ESPHome code, calibration guidance, and safety limitations have been fully reviewed. An ESPHome MQ-2 sensor can show…
Continue with this article