
As an Amazon Associate, I earn from qualifying purchases. En calidad de Afiliado de Amazon, obtengo ingresos por las compras adscritas que cumplen los requisitos aplicables. If you buy through these links, the price is the same for you and Amazon pays me a small commission that helps keep Tecnoyfoto running.

Updated August 2, 2026.
A DS18B20 with ESP8266 and ESPHome is a simple, dependable way to measure temperature in Home Assistant. Every sensor has a unique 64-bit address, so several probes can share one data wire while remaining individually identifiable. This makes the DS18B20 useful for aquariums, pipes, refrigerators, heating systems, tanks and weather stations.
Important ESPHome change: ESPHome 2024.6 removed the old
dallas:hub andplatform: dallas. Current configurations use aone_wirebus andplatform: dallas_temp. Every example in this guide follows the current format.
What is the DS18B20?
The DS18B20 is a digital thermometer originally made by Maxim Integrated, now Analog Devices. It communicates over a 1-Wire bus that needs one data line and ground. Although parasite power is supported, I recommend normal three-wire power with an ESP8266: VDD, DATA and GND. It is easier to troubleshoot and generally more dependable with long cables or multiple sensors.
- Specified measuring range: −55°C to +125°C.
- Specified accuracy: ±0.5°C from −10°C to +85°C.
- Selectable resolution: 9, 10, 11 or 12 bits.
- Supply voltage: 3.0 to 5.5 V.
- Unique 64-bit address for multiple devices on one bus.
These figures come from the official Analog Devices DS18B20 datasheet. A 12-bit conversion can take up to 750 ms, so requesting dozens of readings per second offers no benefit.
Bare sensor or waterproof probe
The DS18B20 is sold as a three-pin TO-92 component and inside stainless-steel probe assemblies. The chip is the same, but an encapsulated probe is more convenient for liquids, pipes or sheltered outdoor projects. A waterproof metal tip does not make the cable joint, connector or ESP8266 board waterproof.
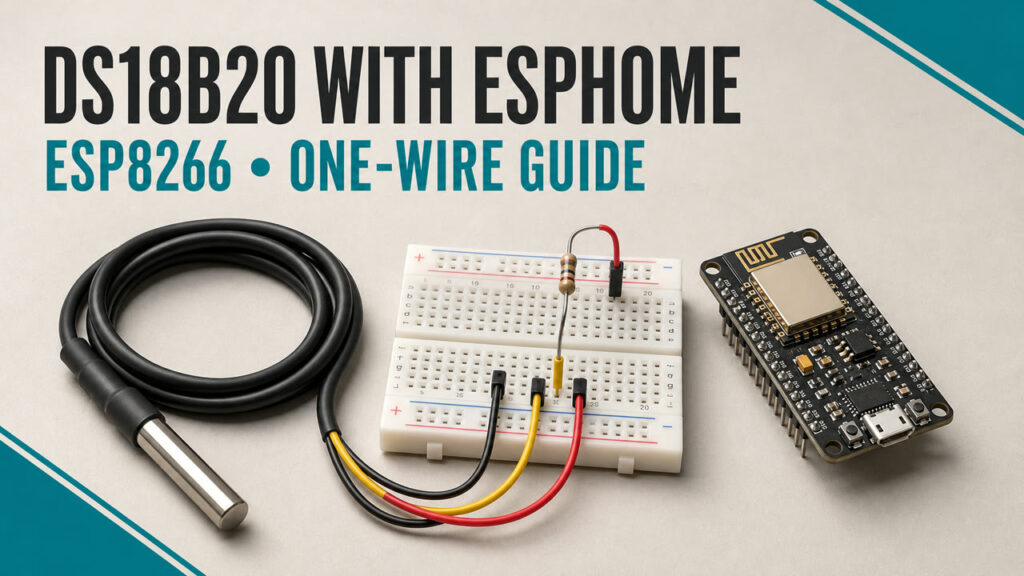
Many probes use red for VDD, black for GND and yellow or white for DATA, but wire colours are not guaranteed between manufacturers. Check the seller’s pinout before applying power. For a TO-92 part, follow the official package drawing and orientation.
Parts required
- One or more DS18B20 sensorsAffiliate link.
- One approximately 4.7 kΩ pull-up resistor per 1-Wire bus.
- An ESP8266 NodeMCUAffiliate link or Wemos D1 miniAffiliate link.
- A breadboard and Dupont jumper wiresAffiliate link for testing.
- A stable USB power supplyAffiliate link.
Amazon links are affiliate links. Your price does not change and purchases help support the project.
Wire the DS18B20 to an ESP8266
| DS18B20 | NodeMCU | Function |
|---|---|---|
| VDD / red | 3V3 | 3.3 V power |
| GND / black | GND | Common ground |
| DATA / yellow or white | D5 / GPIO14 | 1-Wire bus |
Connect a 4.7 kΩ resistor between DATA and 3.3 V. This pull-up holds the bus in its correct idle state. The official ESPHome 1-Wire documentation recommends approximately 4.7 kΩ and notes that nearby values normally work on ordinary wiring.
Every DS18B20 on the same bus is connected in parallel and shares 3.3 V, ground and GPIO14. Only one pull-up resistor is needed per bus. For long installations, avoid a star with many branches; a main run with short stubs and twisted DATA/GND wiring is usually more reliable.
Prepare ESPHome secrets
Create a new ESP8266 device in the ESPHome add-on. If you are new to the platform, start with my Home Assistant guide. Keep credentials in secrets.yaml:
wifi_ssid: "YOUR_WIFI_NAME"
wifi_password: "YOUR_WIFI_PASSWORD"
ds18b20_api_key: "BASE64_KEY_GENERATED_BY_ESPHOME"
ds18b20_ota_password: "A_LONG_OTA_PASSWORD"
Discover each DS18B20 address
Start by configuring only the 1-Wire bus. You do not need to declare a temperature sensor yet. When the device boots, ESPHome scans the bus and prints every detected address in the log:
one_wire:
  - platform: gpio
    pin: GPIO14
    id: bus_1wire
Copy the complete address, including 0x. Use only an address reported by your device; the addresses below are examples.
Complete ESPHome YAML for one DS18B20
substitutions:
  device_name: ds18b20-esp8266
  friendly_name: "DS18B20 ESP8266"

esphome:
  name: ${device_name}
  friendly_name: ${friendly_name}

esp8266:
  board: nodemcuv2

logger:

api:
  encryption:
    key: !secret ds18b20_api_key

ota:
  - platform: esphome
    password: !secret ds18b20_ota_password

wifi:
  ssid: !secret wifi_ssid
  password: !secret wifi_password

  ap:
    ssid: "DS18B20 Fallback"
    password: !secret ds18b20_ota_password

captive_portal:

one_wire:
  - platform: gpio
    pin: GPIO14
    id: bus_1wire

sensor:
  - platform: dallas_temp
    one_wire_id: bus_1wire
    address: 0x1C0000031EDD2A28  # Replace with your address
    name: "DS18B20 Temperature"
    id: ds18b20_temperature
    resolution: 12
    update_interval: 30s
An address is required when the bus contains more than one device. It can be omitted with a single sensor, but including it makes the setup predictable if you later add another probe. Current options are documented by the official ESPHome Dallas Temperature Sensor component.
Use several DS18B20 sensors
one_wire:
  - platform: gpio
    pin: GPIO14
    id: bus_1wire

sensor:
  - platform: dallas_temp
    one_wire_id: bus_1wire
    address: 0x1C0000031EDD2A28
    name: "Supply temperature"
    update_interval: 30s

  - platform: dallas_temp
    one_wire_id: bus_1wire
    address: 0xA40000031F055028
    name: "Return temperature"
    update_interval: 30s

  - platform: dallas_temp
    one_wire_id: bus_1wire
    address: 0xDD0000031EFB0428
    name: "Room temperature"
    update_interval: 30s
ESPHome also supports index, but index order can change when a sensor is replaced, added or removed. Explicit hardware addresses are safer for permanent installations.
Resolution and update interval
| Resolution | Approximate step | Maximum conversion |
|---|---|---|
| 9 bits | 0.5°C | 93.75 ms |
| 10 bits | 0.25°C | 187.5 ms |
| 11 bits | 0.125°C | 375 ms |
| 12 bits | 0.0625°C | 750 ms |
Higher resolution does not increase absolute accuracy. For heating systems and aquariums, 11 or 12 bits with a 30–60 second interval is normally sufficient. Excessive polling adds traffic and can slightly warm the sensor package.
Add the sensor to Home Assistant
- Install the firmware and open Settings → Devices & services.
- Accept the discovered ESPHome device or add the ESPHome integration manually.
- Assign it to an area and confirm that every probe reports a plausible temperature.
A history graph is more useful than a single number:
type: history-graph
title: DS18B20 Temperature
hours_to_show: 24
entities:
  - entity: sensor.ds18b20_temperature
Troubleshooting
ESPHome finds no addresses
Check 3.3 V, ground, DATA and the pull-up resistor. Confirm that GPIO14 is used in both wiring and YAML, and verify your probe’s actual wire colours. Begin with one sensor and a short cable.
CRC errors or unavailable readings
These usually indicate noise, poor power, loose connections or unsuitable cable topology. Shorten stubs, use a twisted DATA/GND pair and keep the bus away from motors, relays and mains wiring.
The sensor reports 85°C
The DS18B20 temperature register contains 85°C after power-up until a conversion completes. If the value repeatedly returns, inspect power, pull-up and bus timing instead of treating it as a real temperature.
The value differs from another thermometer
Allow both probes to stabilise together and compare at several temperatures. Probe construction, thermal contact, water or air circulation and clone quality affect results. Apply an ESPHome offset only after comparison with a trustworthy reference.
DS18B20, DHT22 or BME280?
The DS18B20 measures temperature only, but supports remote probes and several devices on one wire. A DHT22 adds humidity but is slower. A BME280 with ESPHome provides temperature, humidity and pressure over I²C. Choose according to the measurement location rather than simply counting available values.
Final thoughts
The DS18B20 remains an excellent temperature probe for Home Assistant, but old configurations using dallas: should no longer be copied. With a one_wire bus, platform: dallas_temp, a 4.7 kΩ pull-up and real addresses discovered from the log, you can build anything from one dependable thermometer to a maintainable network of probes.
Continue reading
Next related guide · 7 min read
MH-RD Rain Sensor with ESP32 and ESPHome: Updated Guide
Updated August 2, 2026. The MH-RD rain sensor is an inexpensive way to detect when a surface starts getting wet and send that information…
Continue with this article