
As an Amazon Associate, I earn from qualifying purchases. En calidad de Afiliado de Amazon, obtengo ingresos por las compras adscritas que cumplen los requisitos aplicables. If you buy through these links, the price is the same for you and Amazon pays me a small commission that helps keep Tecnoyfoto running.

Last updated on August 1, 2026.
Important warning: this is an educational alcohol-vapor detector, not a certified breathalyzer. It cannot determine whether someone is fit to drive, does not provide a legal alcohol reading, and must never be used for road-safety, medical, or legal decisions. If you have been drinking, do not drive.
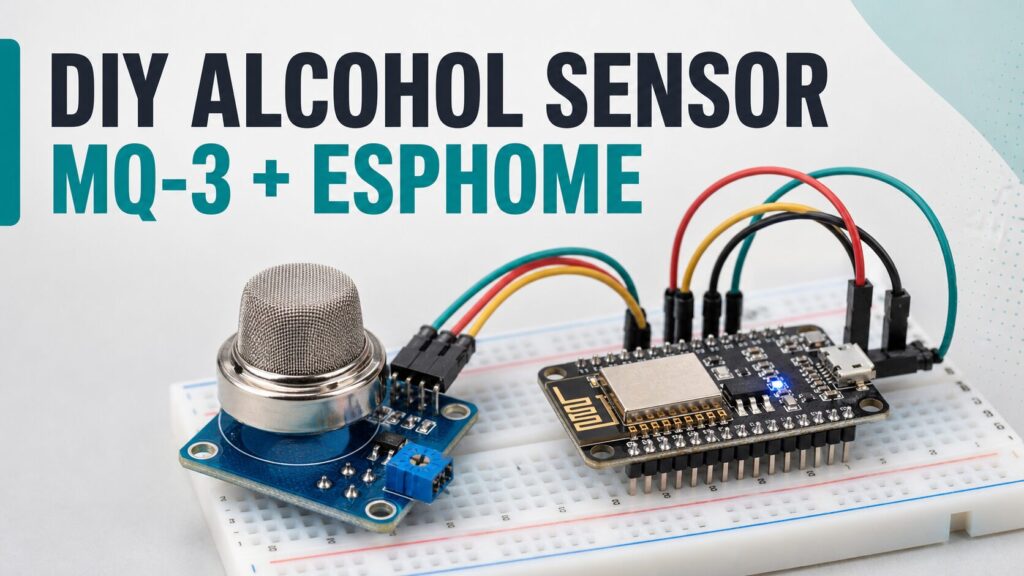
The MQ-3 alcohol sensor is an inexpensive component designed to react to alcohol vapor in the air. Combined with an ESP8266 and ESPHome, it can display an analog signal, retain a history in Home Assistant, and teach useful lessons about resistive gas sensors, voltage dividers, and calibration.
This guide builds a safe experimental detector for learning. An earlier version of the project converted voltage directly into ppm and mg/L with generic constants. That conversion is not valid: the sensor, module, load resistor, temperature, humidity, and exposure method all affect the response. The updated code therefore publishes the real ADC signal instead of inventing an alcohol concentration.

How the MQ-3 sensor works
The MQ-3 sensing element uses heated tin dioxide, SnO₂. Its resistance changes when certain vapors reach the sensing surface. A breakout module converts that change into an analog voltage through a load resistor.
According to the Winsen MQ-3B documentation, the sensor targets alcohol across a laboratory test range of 25–500 ppm. Its heater requires 5.0V ±0.1V, may consume up to 900 mW, and the manufacturer specifies more than 48 hours of preheating to obtain the stated characteristics under its test conditions.
Those specifications do not turn a low-cost module into a breathalyzer. The MQ-3 also responds to other vapors, while temperature, humidity, oxygen concentration, aging, and manufacturing tolerance alter the reading. It also lacks the controlled breath sampling used by professional instruments.
What this project can actually measure
- A relative analog signal that rises when the concentration of detectable vapor changes.
- A Home Assistant history showing baseline, exposure, and recovery.
- Heater warm-up, drift, and environmental contamination.
- An educational starting point for studying
Rs/R0with proper reference gas and instrumentation.
It cannot produce a blood-alcohol value or a dependable mg/L breath reading. Those measurements require equipment that was specifically designed, calibrated, and certified for that purpose.
Components
- MQ-3 sensor moduleAffiliate link.
- An ESP8266 development board, such as a NodeMCU or Wemos D1 Mini.
- Dupont jumper wiresAffiliate link and, optionally, a breadboardAffiliate link.
- A stable 5V USB power supplyAffiliate link with enough headroom for the ESP8266 and heater.
- Two resistors for adapting the analog output to the ADC.
- A multimeter for checking every voltage before connecting A0.
- ESPHome and, optionally, Home Assistant.
This article contains affiliate links. If you buy through them, the price is the same for you and the store may pay Tecnoyfoto a small commission that helps support the website.
Safe MQ-3 wiring for an ESP8266
The MQ-3 heater needs a stable 5V supply and consumes much more power than a small digital sensor. Do not power it from the ESP8266 3.3V pin. You can use the USB-derived 5V/VIN rail when the development board and supply are suitable, or a separate regulated 5V supply. All grounds must be connected together.
Protecting the analog input
Do not connect AO directly to A0 until you have checked the limits. The ESP8266 chip ADC accepts only 0–1.0V. Some development boards include a divider: for example, the LOLIN D1 Mini 3.1.0 documentation specifies a 3.2V maximum at its A0 connector. Other boards can differ, and an MQ-3 module powered from 5V can produce a signal above those limits.
Measure the output first and use an external divider that keeps the worst-case voltage within the documented limit of your board:
Vadc = Vmq3 × R2 / (R1 + R2)

R1: between MQ-3 AO and A0
R2: between A0 and GND
For a Wemos D1 Mini documented for 3.2V at A0, a 10 kΩ and 15 kΩ divider limits a possible 5V signal to about 3.0V. A bare 1V ESP8266 ADC needs much stronger reduction; 47 kΩ and 10 kΩ keep 5V below 0.9V. Verify the result with a multimeter and consult the exact schematic for your board.
Connections
- MQ-3 VCC → stable 5V.
- MQ-3 GND → ESP8266 and power-supply ground.
- MQ-3 AO → resistor divider → A0.
- DO: optional; it only provides a comparator threshold set by the module potentiometer, not a concentration.
Updated ESPHome configuration
The ESPHome ADC component reports the voltage seen by the chip ADC. Its ESP8266 scale is 0–1.0V; boards with a built-in divider may require a multiplier to reconstruct the voltage at their A0 connector. Do not add multiply: 3.3 automatically. Confirm the board schematic and your external divider first.
sensor:
  - platform: adc
    pin: A0
    id: mq3_adc
    name: "MQ-3 analog signal"
    update_interval: 2s
    accuracy_decimals: 3
    unit_of_measurement: "V"
    icon: mdi:chart-bell-curve
    filters:
      - median:
          window_size: 7
          send_every: 3
          send_first_at: 3
      # Add a multiply filter only when you know the real scale
      # of the board's divider and your external divider.

# Optional local diagnostic page.
# Never expose it directly to the Internet.
web_server:
  port: 80
This configuration provides an honest filtered signal. It does not label the result as ppm or mg/L because a rule such as voltage × constant cannot represent the sensor’s logarithmic response, variation between modules, or controlled breath sampling.
After the firmware is installed, the ESPHome integration adds the entity to Home Assistant automatically. The ESPHome MQ-2 gas-sensor guide provides another example from the same family of resistive sensors.
Home Assistant card
A history graph is more useful than a fictional absolute value because it shows warm-up, exposure, and recovery:
type: history-graph
title: Experimental MQ-3 signal
hours_to_show: 2
entities:
  - entity: sensor.mq_3_analog_signal
    name: MQ-3
Warm-up, baseline, and testing
- Initial conditioning: follow the manufacturer’s specification of more than 48 hours of preheating for its test conditions.
- Repeatability: use the same voltage, warm-up time, position, and ventilation for every comparison.
- Baseline: record the signal in clean, stable air. A baseline does not equal 0 mg/L.
- Controlled demonstration: briefly bring a diluted vapor source near the sensor from a distance. Do not pour alcohol onto it, do not use a flame, and ventilate afterward.
- Recovery: wait until the signal returns to a stable region before repeating the test.
Estimating concentration would require measuring sensor resistance, knowing the load resistor, determining R0 with certified ethanol reference gas, fitting the Rs/R0 curve, and controlling temperature and humidity. Even then, this assembly would not become a certified breathalyzer or a tool for deciding whether someone may drive.
Troubleshooting
The reading stays high in an empty room
The sensor can react to perfume, cleaning products, smoke, and other vapors. It may also still be warming up. Ventilate, remove possible contaminants, and wait for the signal to stabilize.
A0 remains at its maximum value
Disconnect AO and check its voltage immediately. The signal may exceed the ADC range or the divider may be wrong. Do not continue until the cause is corrected.
Two sensors show different values
This is normal. Manufacturing spread is significant, and each breakout may use a different load resistor. Compare trends after conditioning; do not compare absolute voltages between units without individual calibration.
The signal recovers slowly
Recovery is not instantaneous. Ventilate and wait. Reducing the software update interval does not accelerate the physical recovery of the sensing material.
Frequently asked questions
Can this project tell me whether I can drive?
No. Never use this project to decide whether you can drive or to compare a reading with a legal limit. If you have consumed alcohol, arrange alternative transport.
Can I display mg/L or ppm in Home Assistant?
Only use those units when you have traceable calibration, certified reference gas, and suitable instrumentation. A home project should display voltage or a clearly labeled relative signal.
How long does the MQ-3 need to warm up?
Winsen specifies more than 48 hours of preheating under its test conditions. After initial conditioning, always use a consistent warm-up period and wait for a stable baseline.
Can I use an ESP32?
Yes, but you must still scale the signal to the limit of the selected ADC pin and configure attenuation correctly. Never feed a possible 5V output directly into the ESP32.
Does it work without Home Assistant?
Yes. You can inspect the ESPHome logs or enable the optional local web server in the example. Home Assistant makes history and graphs easier, but it is not required.
Conclusion
An MQ-3 with an ESP8266 is a useful project for learning about gas sensing, ADC inputs, filtering, and Home Assistant. Its value lies in observing trends and understanding the limitations of an inexpensive semiconductor sensor—not in imitating a professional breathalyzer.
You can find more ESPHome and electronics projects on the Tecnoyfoto YouTube channel.
Technical sources
Continue reading
Next related guide · 8 min read
ESPHome Relay Module with ESP32: Safe 4-Channel Guide
Updated August 1, 2026. The wiring, GPIO guidance, and configuration have been checked against current ESPHome documentation. An ESPHome relay module lets an ESP32…
Continue with this article